If you wish to receive our notifications in your Splunk/VictorOps account, please follow the guide below.
1) Obtaining the ‘REST Key’:
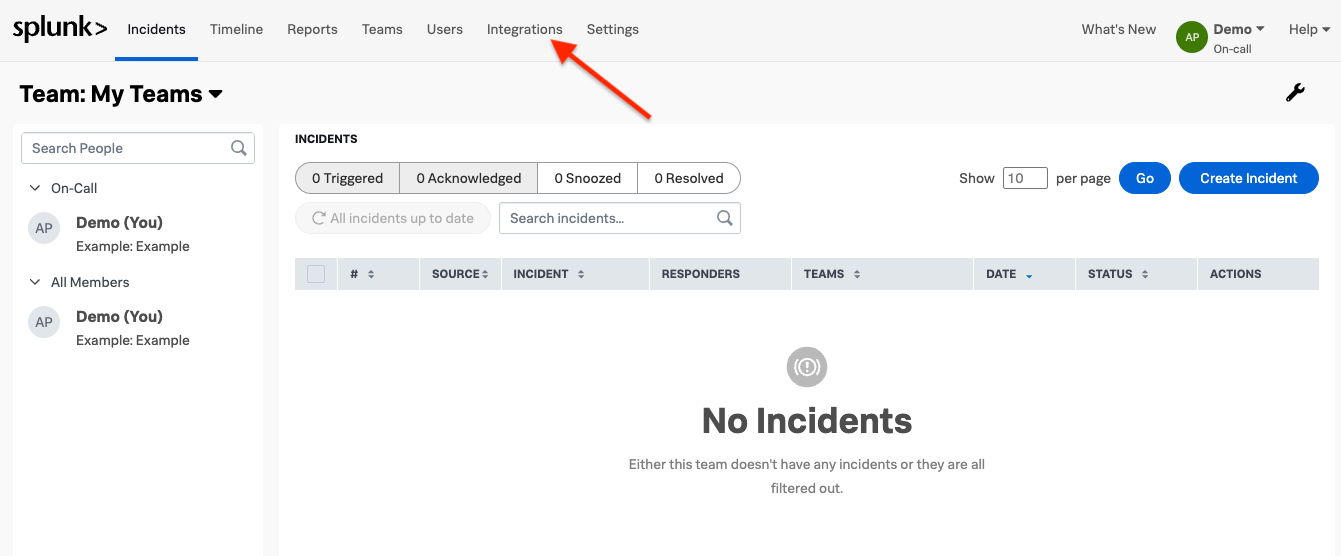
To get started, you will first need your Splunk/VictorOps REST Key, which you can get from your Splunk/VictorOps account by going to the ‘Integrations’ link from the top side menu:
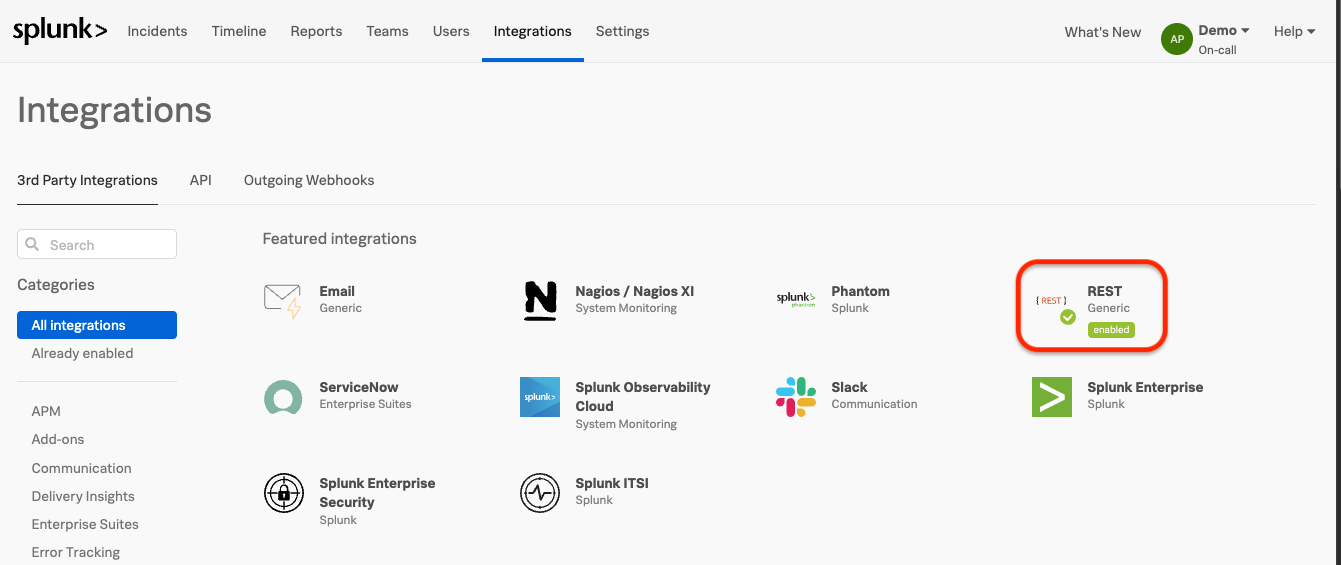
On the ‘Integrations’ page, locate the ‘REST’ integration and click on it:
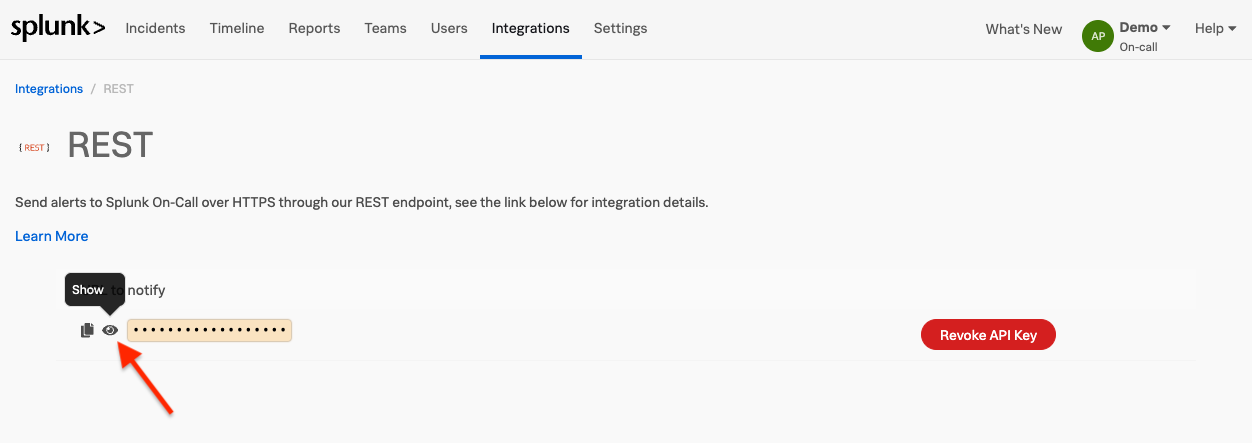
On the following page, click on the ‘Show’ button, to view your REST URL, from which you can extract the REST Key:
Now that you have your REST URL revealed, copy your REST Key:
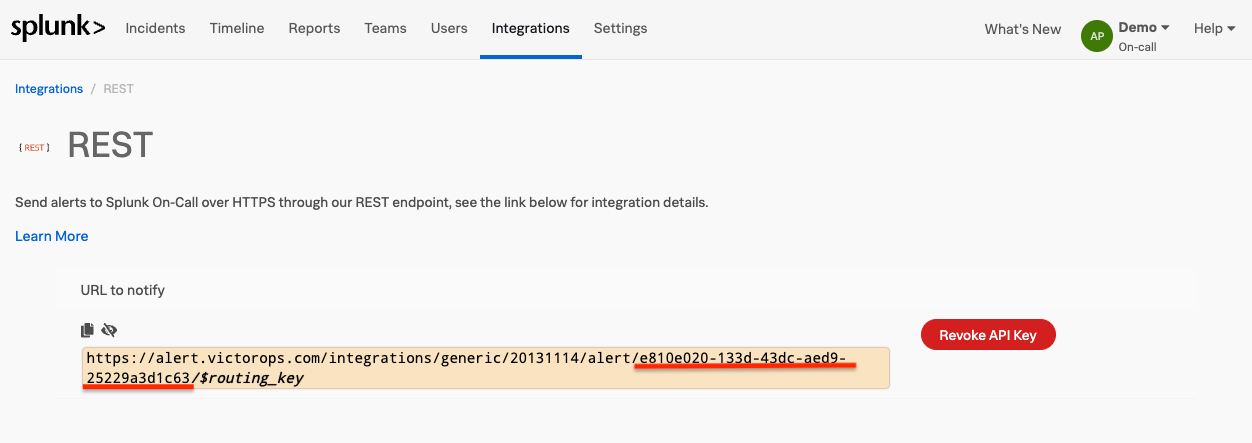
Save this key somewhere, as you will need it later in this guide when configuring the Contact List on our platform.
Note: To learn more about the VictorOps REST Integration, you should read their documentation:
https://help.victorops.com/knowledge-base/rest-endpoint-integration-guide/
2) Obtaining the ‘Routing Key’:
Next up, you’ll need your Routing Key, which you can get by going to the ‘Settings’ menu and selecting ‘Routing Keys’. In here, click on the ‘Add Key’ button located towards the bottom right corner:

Then you’ll have to give a name to your Routing Key, select an Escalation Policy for it, and click on the save button:
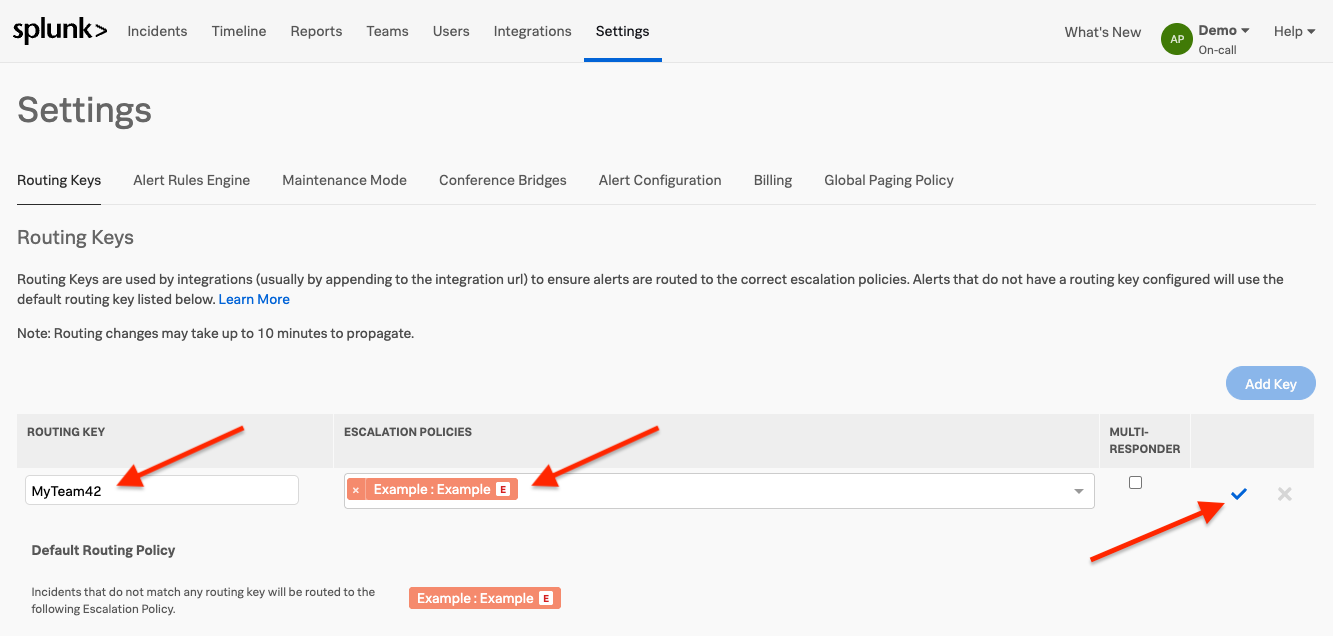
You should note down your Routing Key as well, since you will need it when configuring the Contact List on our platform.
Note: To learn more about how VictorOps Routing Keys work, you should read their documentation:
https://help.victorops.com/knowledge-base/routing-keys/
3). Configure the HetrixTools Contact List:
Now that you’ve got your REST Key and Routing Key, you can proceed to configure the HetrixTools Contact List.
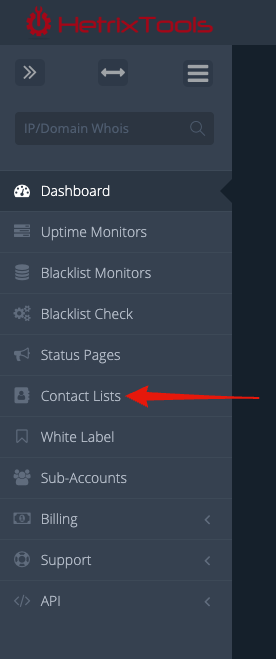
Start by heading to your Contact Lists page from your HetrixTools client area:
Here you can create a new Contact List or edit any existing one. For this guide, we’ll be creating a new contact list by clicking on the ‘Add New Contact List’ button:

Under the ‘VictorOps’ tab in the Contact List pop-up window, fill out the REST Key and Routing Key, which you have obtained earlier in this guide.
Then, select the severity at which the HetrixTools notifications will be processed at, in your VictorOps account.
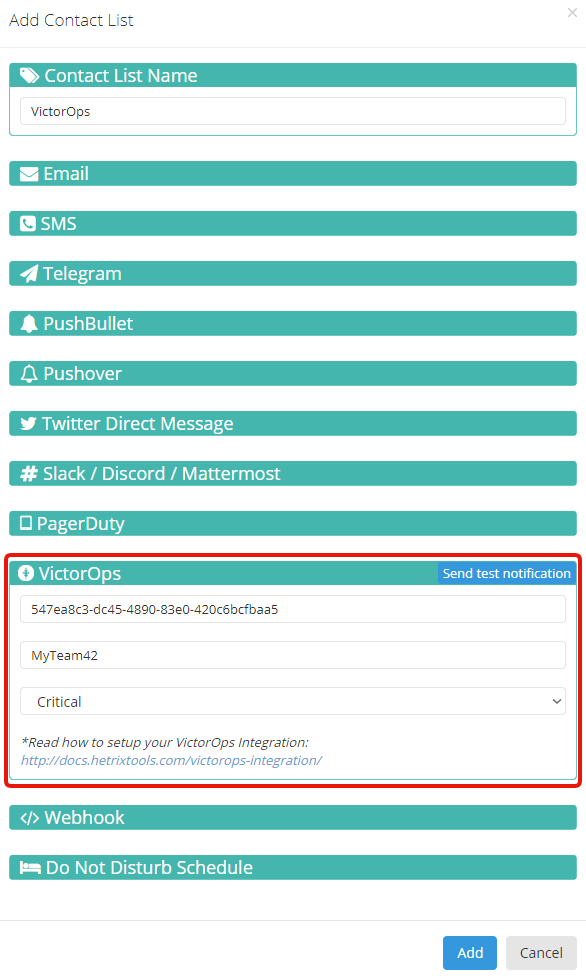
You can try out the integration by clicking on the ‘Send test notification’ button.
When you’re done inputting the data in your Contact List, be sure to save it by clicking on the ‘Add’ or ‘Save’ button at the bottom of the pop-up modal.
You are now all set to receive notifications sent to this Contact List in your VictorOps account.
How does HetrixTools handle VictorOps incidents?
If you select the “Critical” severity in your Contact List configuration on the HetrixTools platform, then the notifications that will be sent out will open incidents in your VictorOps account.
Our ‘Uptime Monitoring’ notifications will open an incident when a monitor goes offline, and will close this incident when the monitor comes back online.
Our ‘Server Resource Usage’ notifications will open incidents when the resource usage goes above your set warning limits. These incidents will not be closed by our platform.
Our ‘Blacklist Monitoring’ notifications will open incidents when changes (blacklisting/delisting) are detected with your monitors. These incidents will not be closed by our platform.
Note: selecting “Info” or “Warning” severity does not open up incidents in your VictorOps account; the notifications just appear on your VictorOps timeline.