
This guide will explain how to connect your Microsoft SNDS account to the HetrixTools platform so you can have your SNDS IPs monitored by our Blacklist Monitoring service.
[ Direct link to this setting in your account: https://hetrixtools.com/dashboard/account/settings/blacklist-monitor/#blmon-snds-monitoring ]
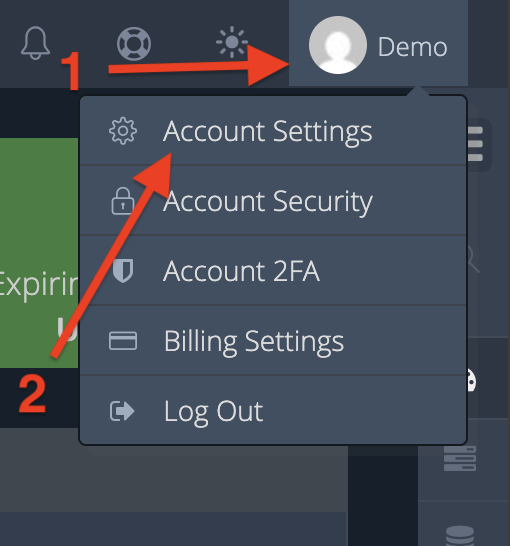
Start by going to your ‘Account Settings’ from the drop-down menu when clicking your name in our dashboard.
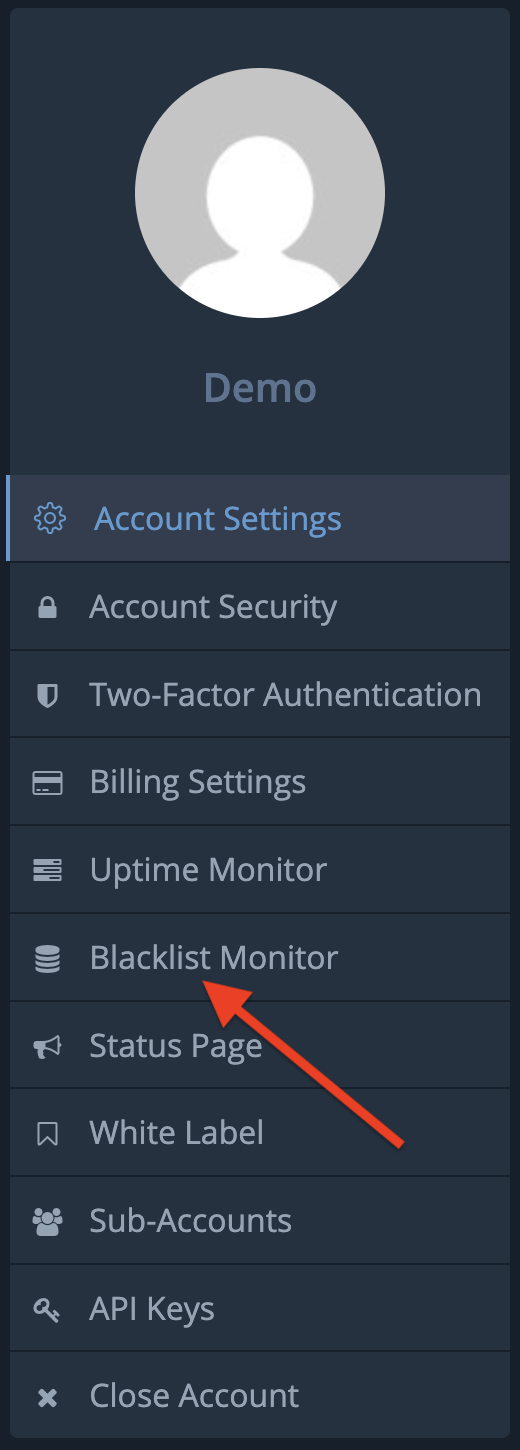
Then, on the Account Settings page, click on the ‘Blacklist Monitor’ link from the side menu.
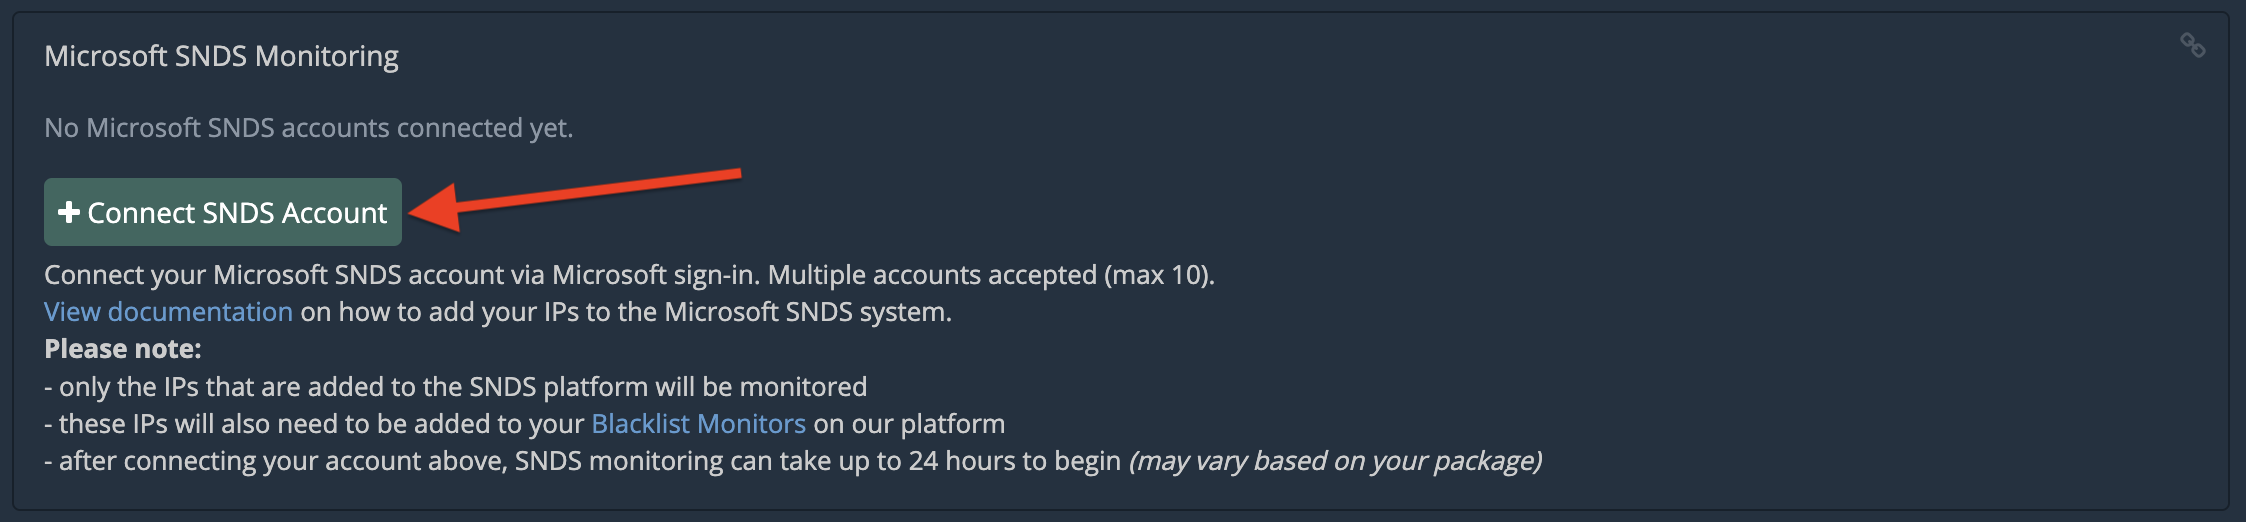
On the Blacklist Monitor settings page, locate the ‘Microsoft SNDS Monitoring’ section, and click on the ‘Connect SND Account’ button.
A slide-down panel will appear. Click on the ‘Open Microsoft sign-in’ button.
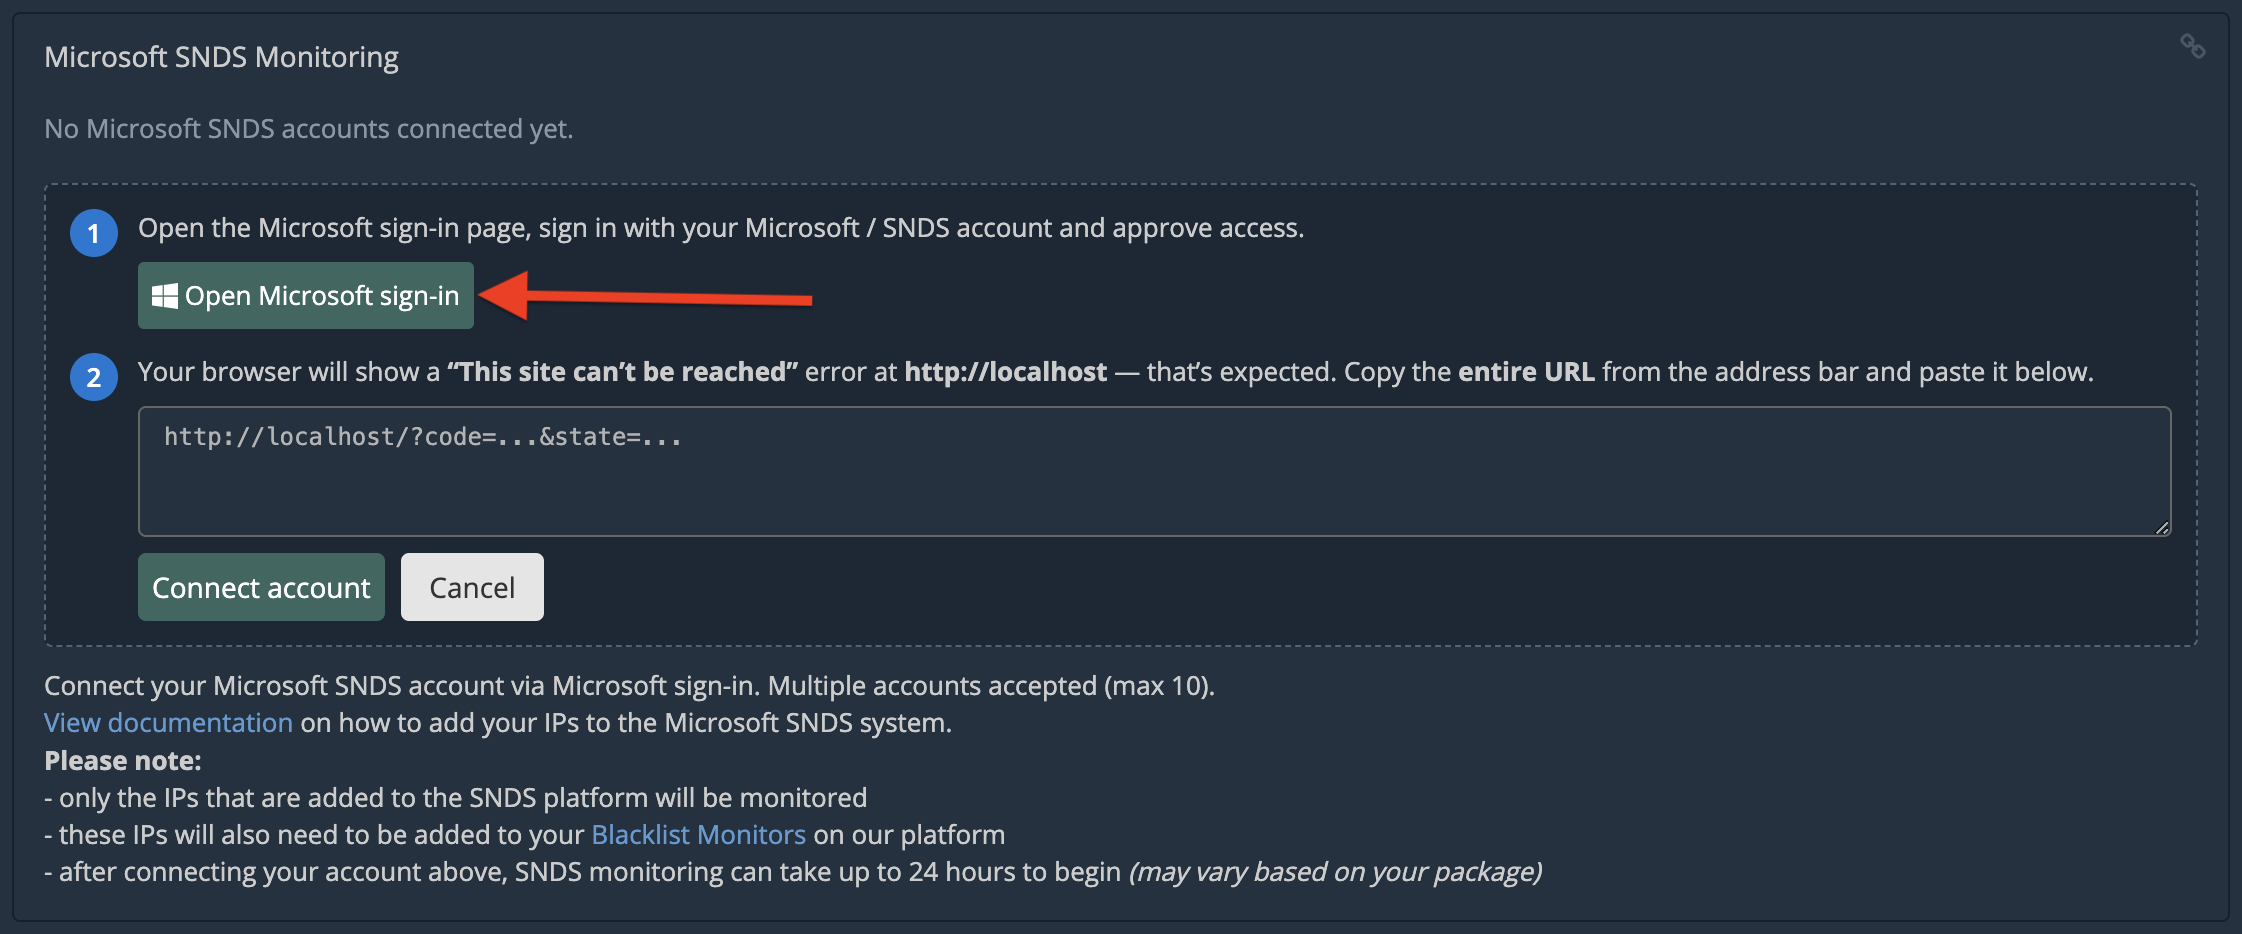
A new tab or window will open up (do not close the tab/window with the HetrixTools Microsoft SNDS Monitoring panel [pic above]; you will need it to finish the setup later in this guide).
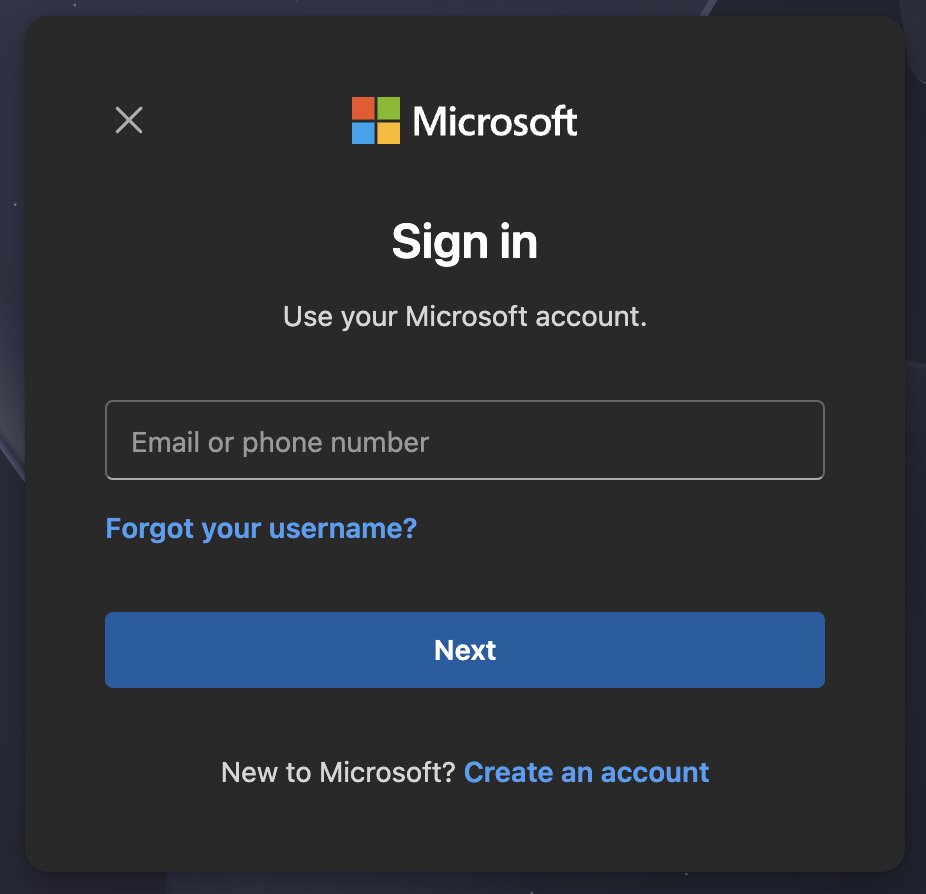
In the newly opened tab/window, sign in to your Microsoft account (the same account you used when adding your IPs to the SNDS platform).
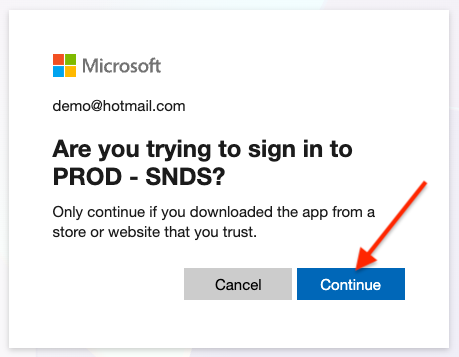
Once signed into your Microsoft Account, you will be asked to grant SNDS read access. Click on the ‘Continue’ button.
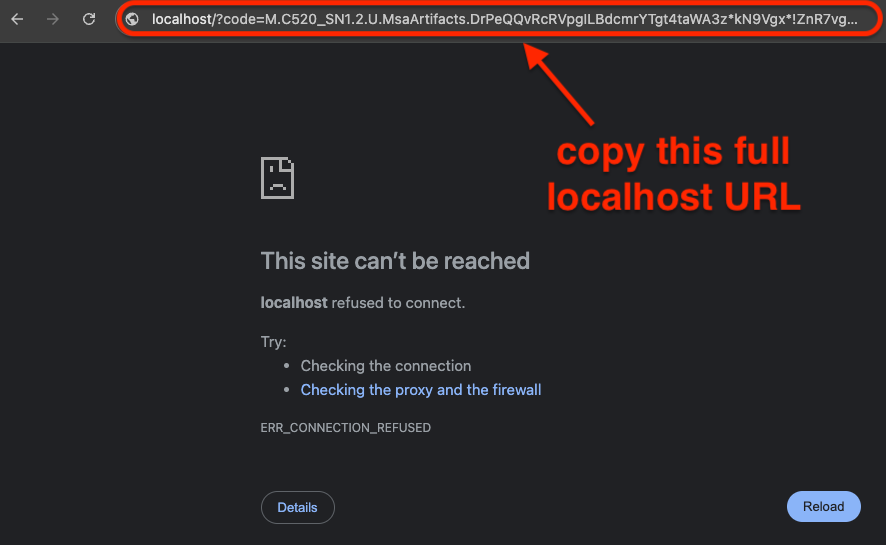
You will then be redirected to what seems to be a broken localhost link. You will need to copy that full localhost URL and paste it later on our platform.
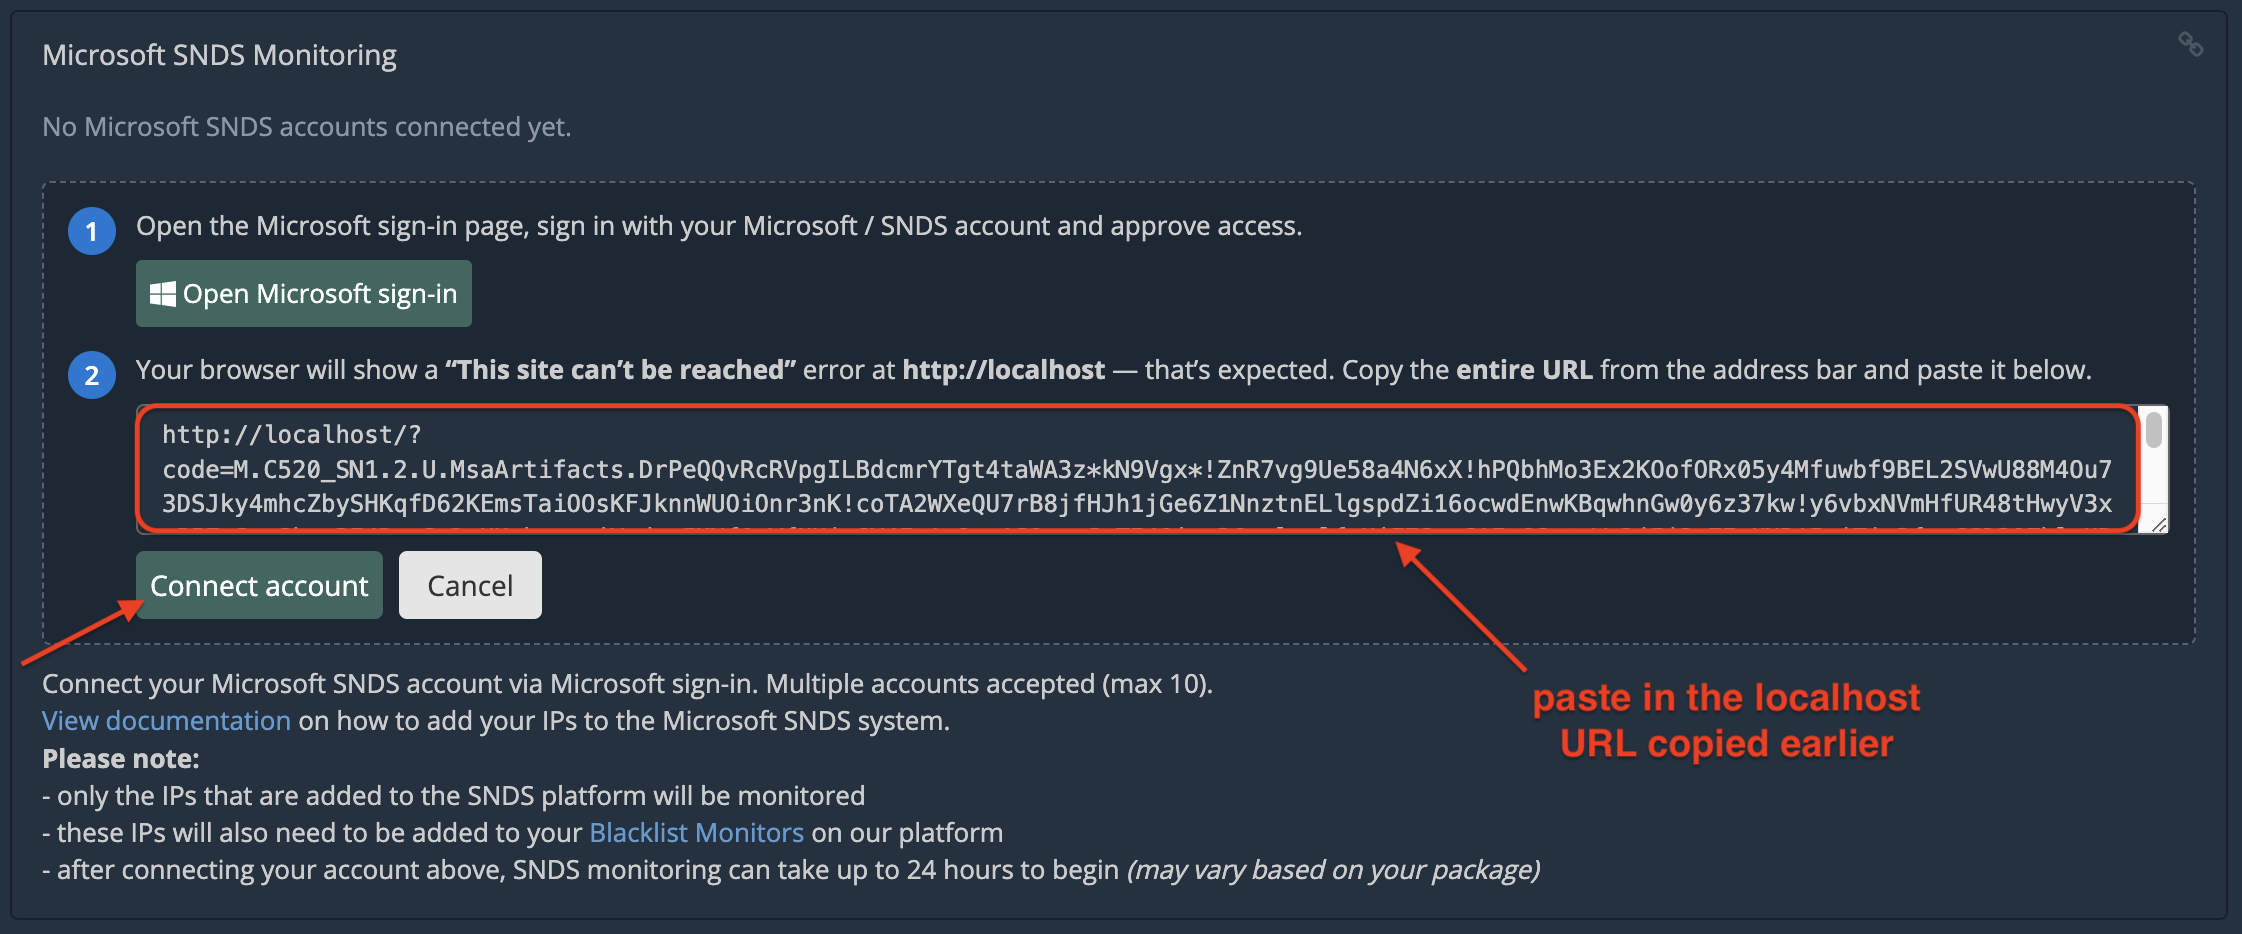
Then, return to the HetrixTools Microsoft SNDS Monitoring panel, paste in the URL you have copied [pic above], then click on the ‘Connect account’ button.
And that’s it. Our platform is now connected to your Microsoft account, allowing us to read your SNDS IP data, which will enable our system to Blacklist Monitor your IPs on the SNDS platform.
