In this guide, we’ll show you how to set up your cron job Heartbeat Uptime Monitor to accept Linux-based cron strings.
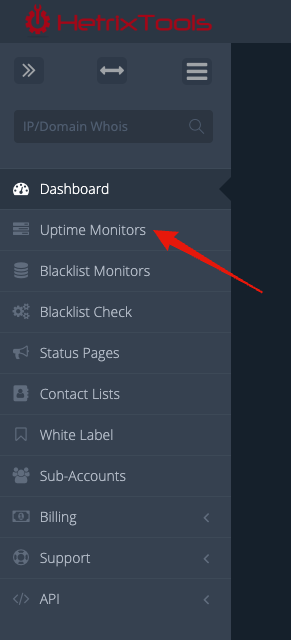
Start by going to the Uptime Monitors dashboard from your client area menu.
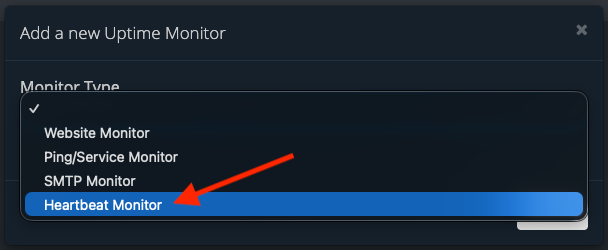
Now, click on the “Add Monitor” button to add a new Uptime Monitor to your account.

Select the “Heartbeat Monitor” under “Monitor Type” in the pop-up modal.
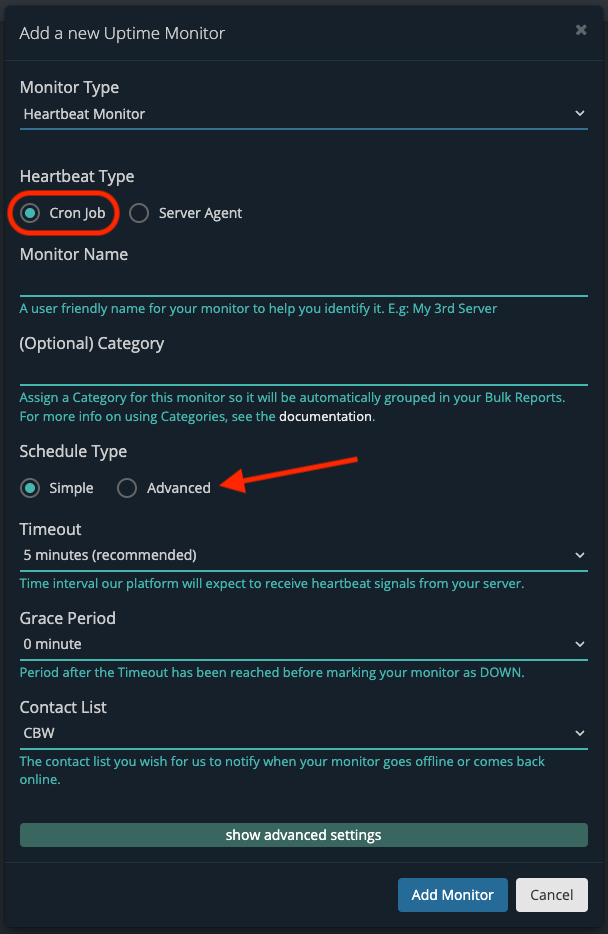
Make sure “Cron Job” is selected under “Heartbeat Type” (should be selected by default). Then, click on “Advanced” under the “Schedule Type” section.
Configure your CRON string and the timezone it will run in, and then click on the “Add Monitor” button at the bottom of the modal.
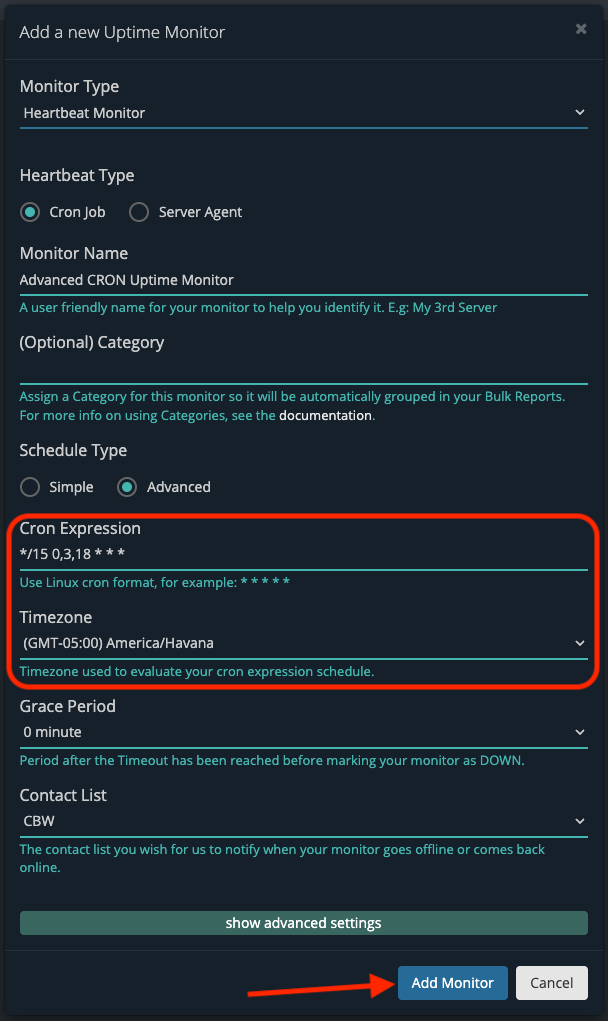
Specifying the correct timezone on which your server runs this cron job will be very important, so our platform will know when to expect the next link access from your running cron job.
Your new Uptime Monitor has now been added to your dashboard. You’ll need to access the Heartbeat link once for the first time in order for the monitor to start running.
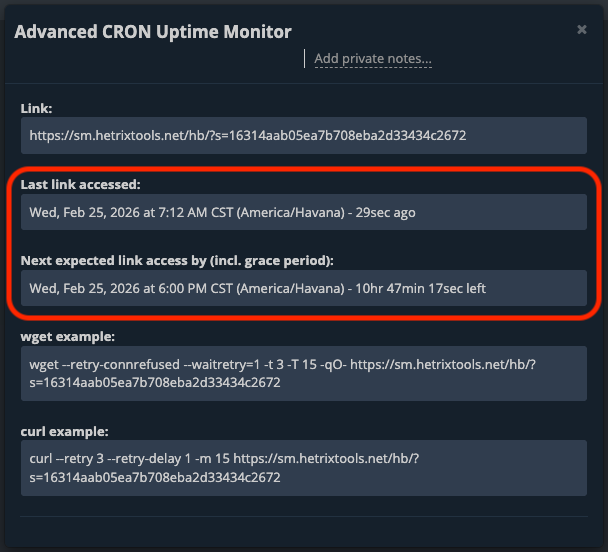
And that’s all there is to it. Your Uptime Monitor will now expect its link to be accessed at specific times based on your defined cron job string. If the link is not accessed at the next expected time, the system will wait the Grace Period defined time, then declare your Uptime Monitor as being down, and will alert you about it.