This guide is now deprecated, as explained here:
https://docs.hetrixtools.com/microsoft-snds-changes-july-2026/
You can set up the new Microsoft SNDS integration as shown in the current guide:
https://docs.hetrixtools.com/configure-microsoft-snds-monitoring/
[DEPRECATED]
Our platform can monitor the IPs that you’ve added to your Microsoft SNDS account and notify you as these IPs get blacklisted or delisted on the Microsoft SNDS system.
To get started, you should first add your IPs to the SNDS platform as described in the following article:
https://docs.hetrixtools.com/adding-your-ips-to-microsoft-outlook-snds/
Then you will need to enable automated data access (API) to your SNDS account, as described in the article linked below:
https://docs.hetrixtools.com/enable-automated-data-access-for-your-microsoft-outlook-snds-account/
After you have obtained your SNDS Key, you should go to your ‘Account Settings’ on our platform:
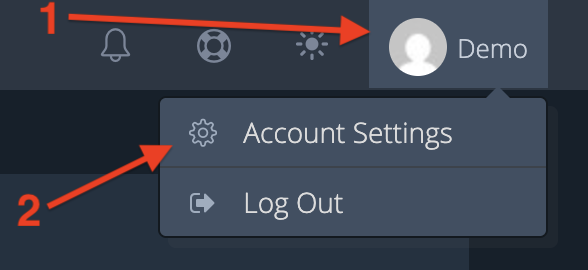
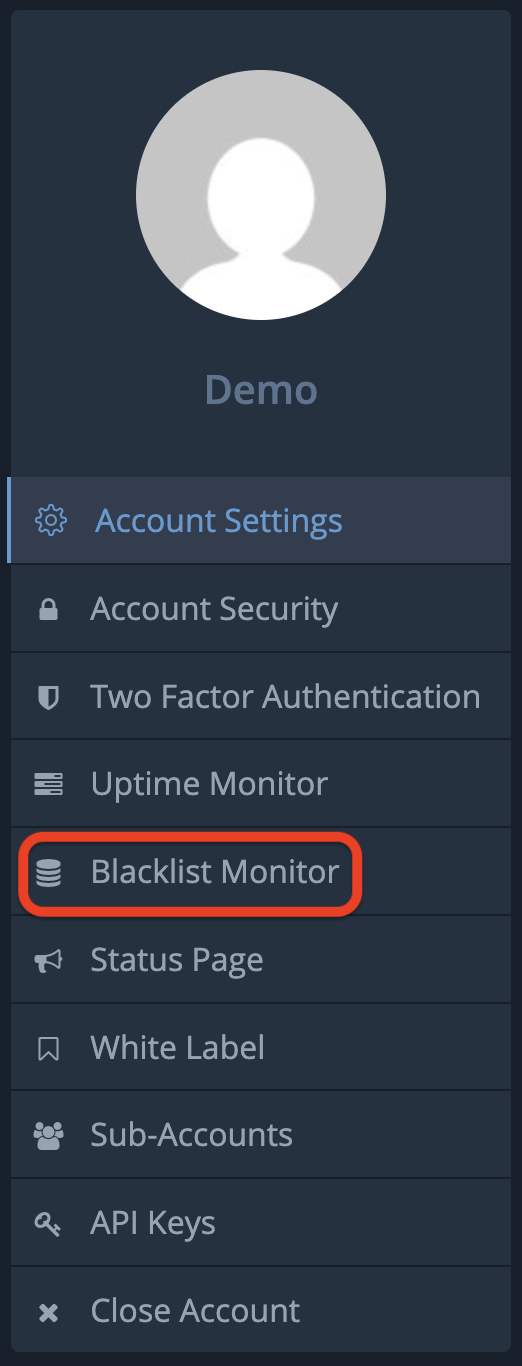
And select the ‘Blacklist Monitor’ tab from your Account Settings menu:
Then, towards the bottom of the page, locate the ‘ Microsoft SNDS Key(s)’ section. Here you’ll need to input your SDNS key(s) and then click on the ‘Save’ button:

After saving your SNDS Key(s) in your HetrixTools Account Settings, the changes will take full effect after the next automatic checkup of your blacklist monitors.
Please note:
- Only the IPs that have been added to the SNDS platform will be monitored; all other IPs in your HetrixTools account will appear as being ‘not blacklisted’ on the SNDS RBLs.
- You can add up to 10 SNDS Keys to your HetrixTools account. If you need to add more than this, please contact our support.