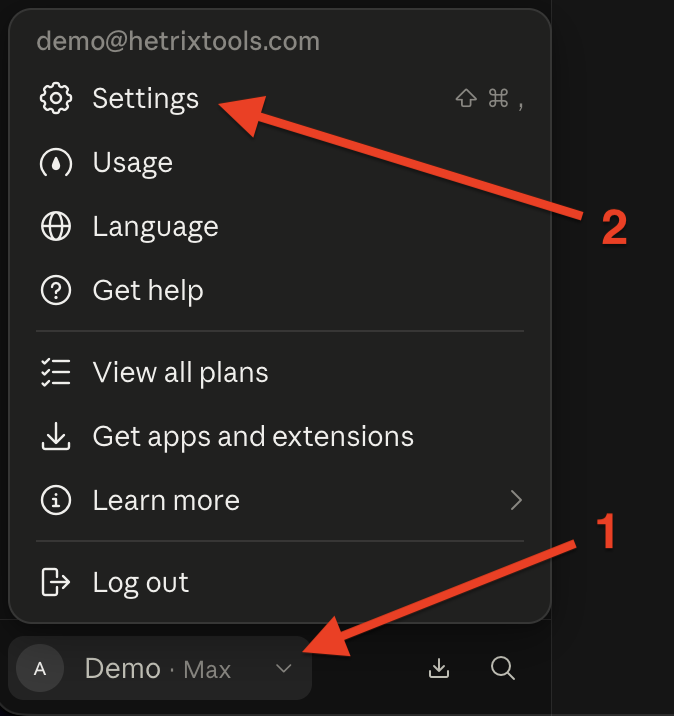
Start by accessing the “Settings” menu from your Claude interface.
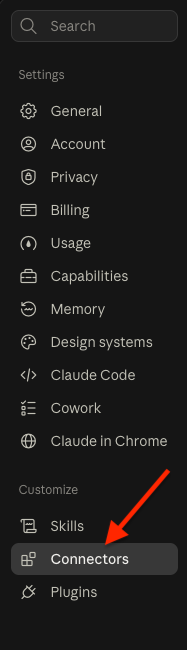
Then, click on the “Connectors” link from the settings side menu.
On the “Connectors” page, click on the “Add” button and then select “Add custom connector”.

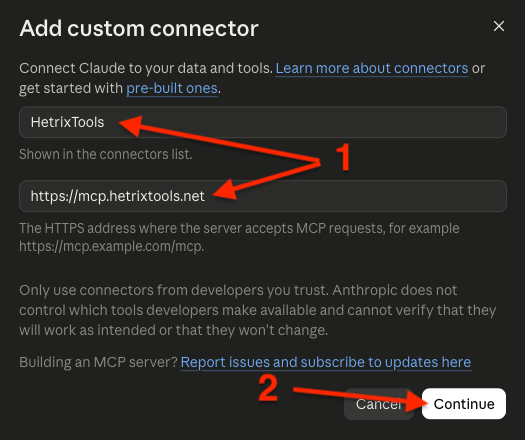
Fill in the connection details as follows, then click on the “Continue” button.
Name: HetrixTools
MCP server URL: https://mcp.hetrixtools.net/
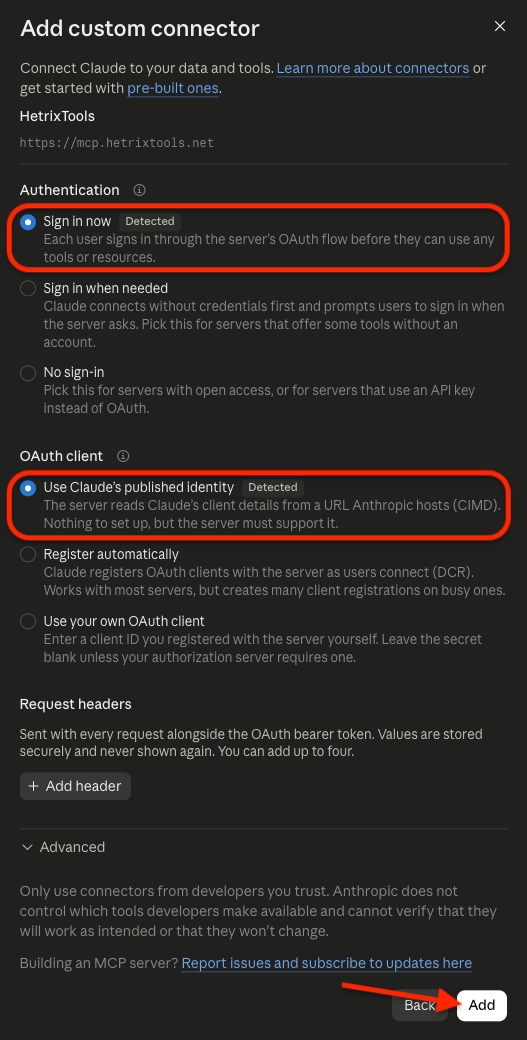
On the next screen, Claude should detect the correct connection settings, so you’ll only have to click the “Add” button.
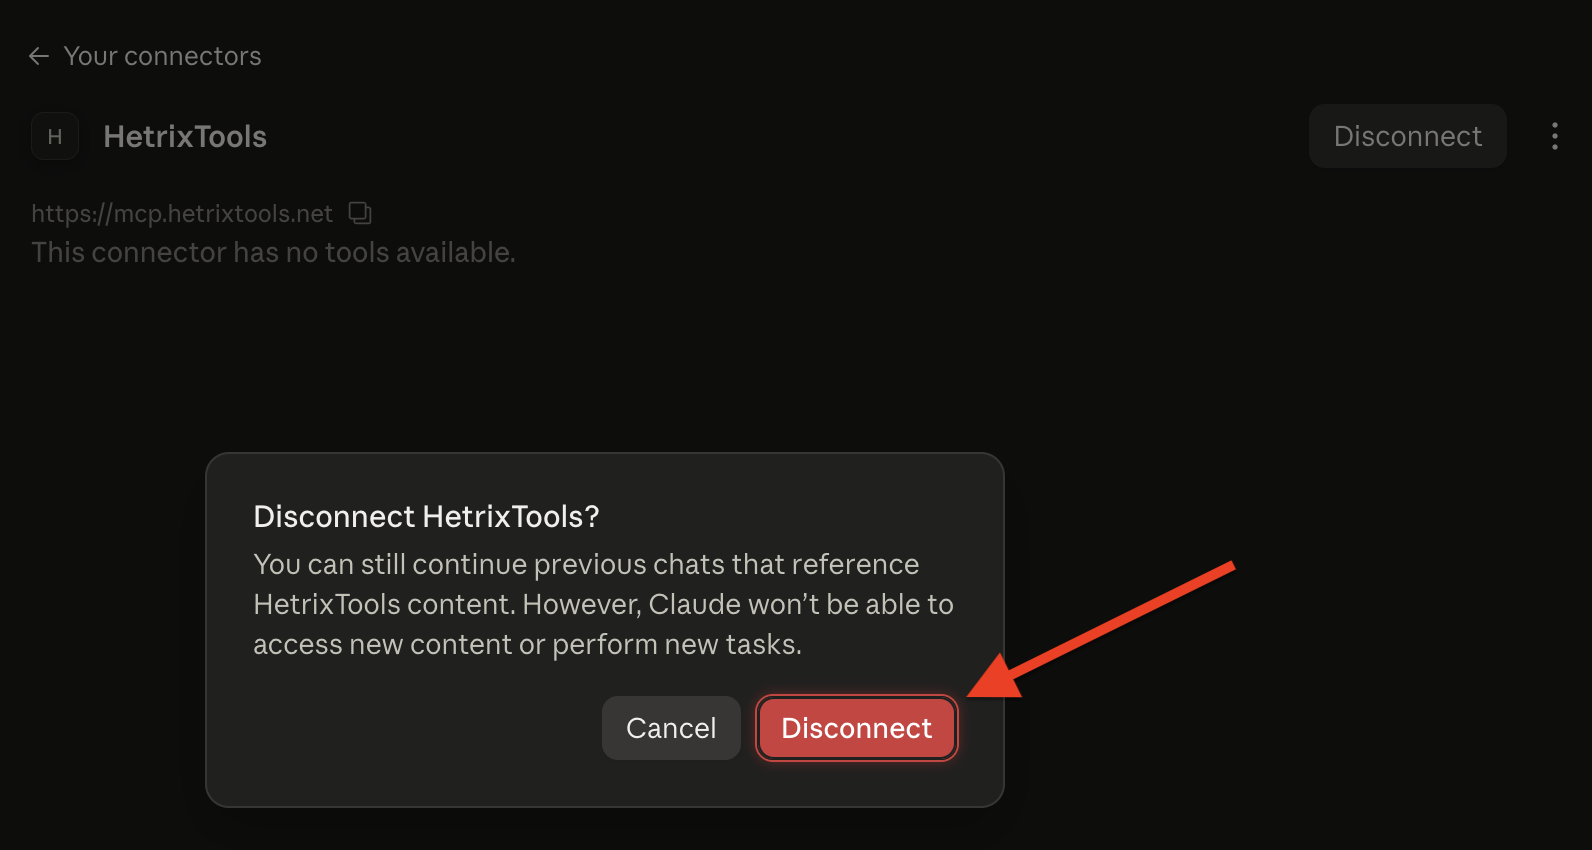
In some cases, especially if you’ve connected to our MCP before, Claude may simply add the MCP right after you click the “Add” button, without asking you for your HetrixTools API key(s). In such cases, you’ll have to force a disconnect and reconnect, so Claude will take you through the authentication process.

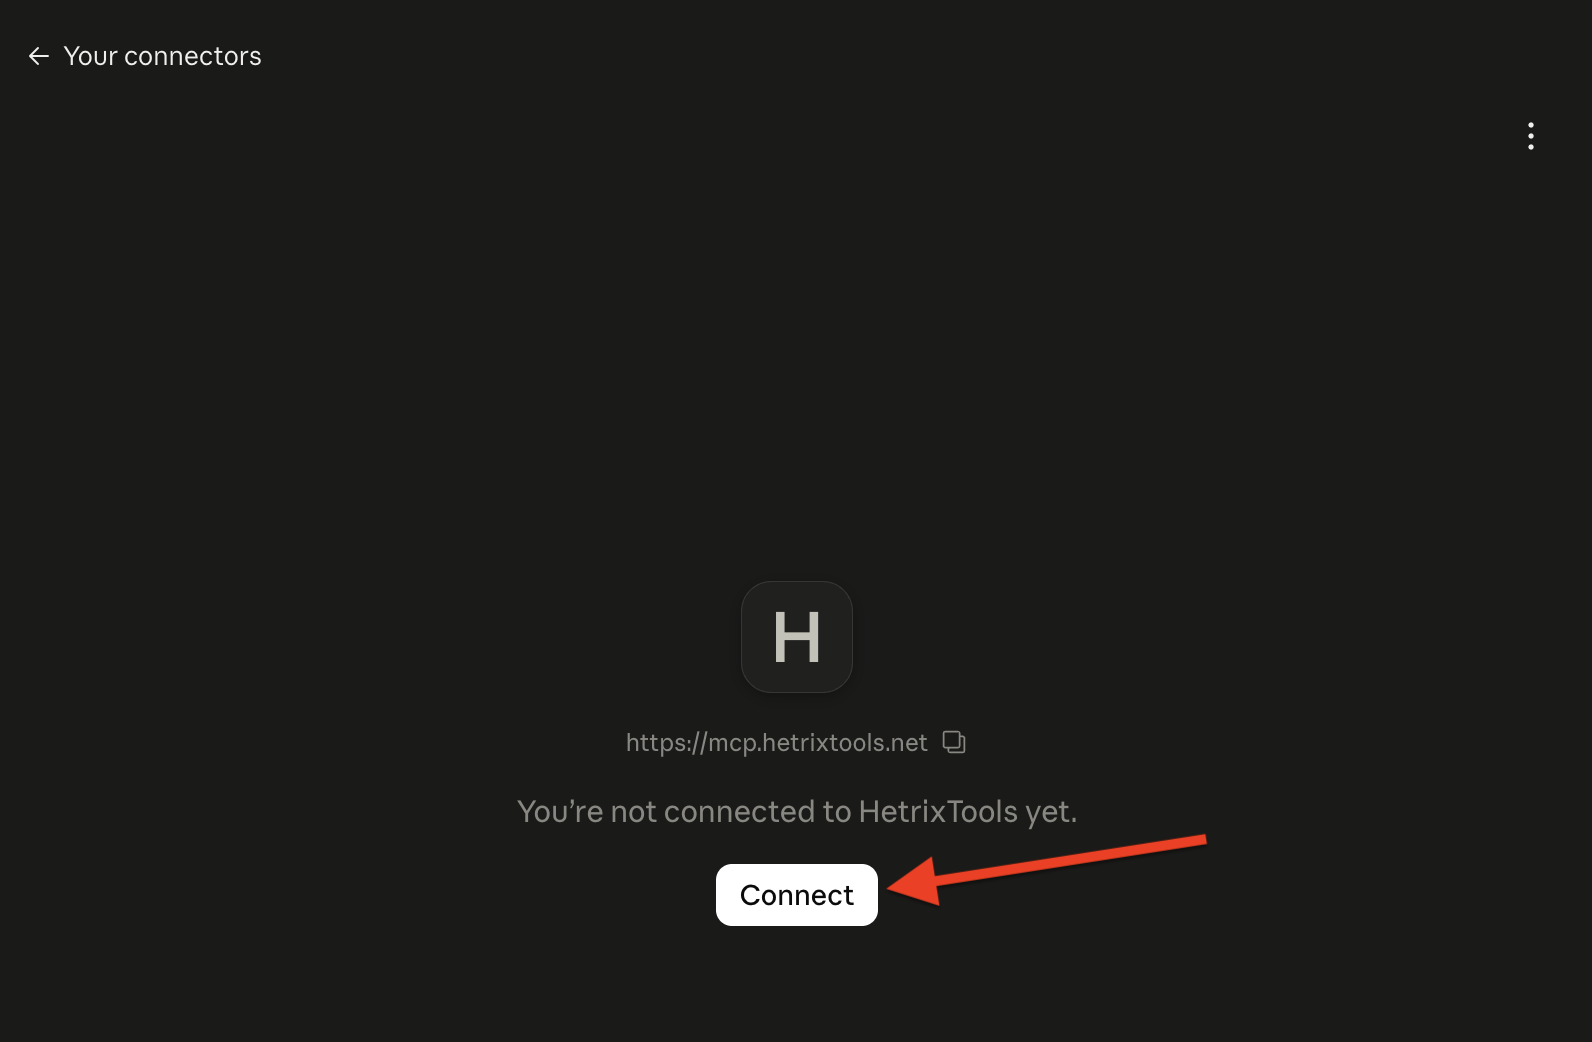
Then, you will be taken through the authentication process, where you’ll have to provide your HetrixTools API key(s). We recommend you scope your keys to be allowed to perform just the actions you need them to.
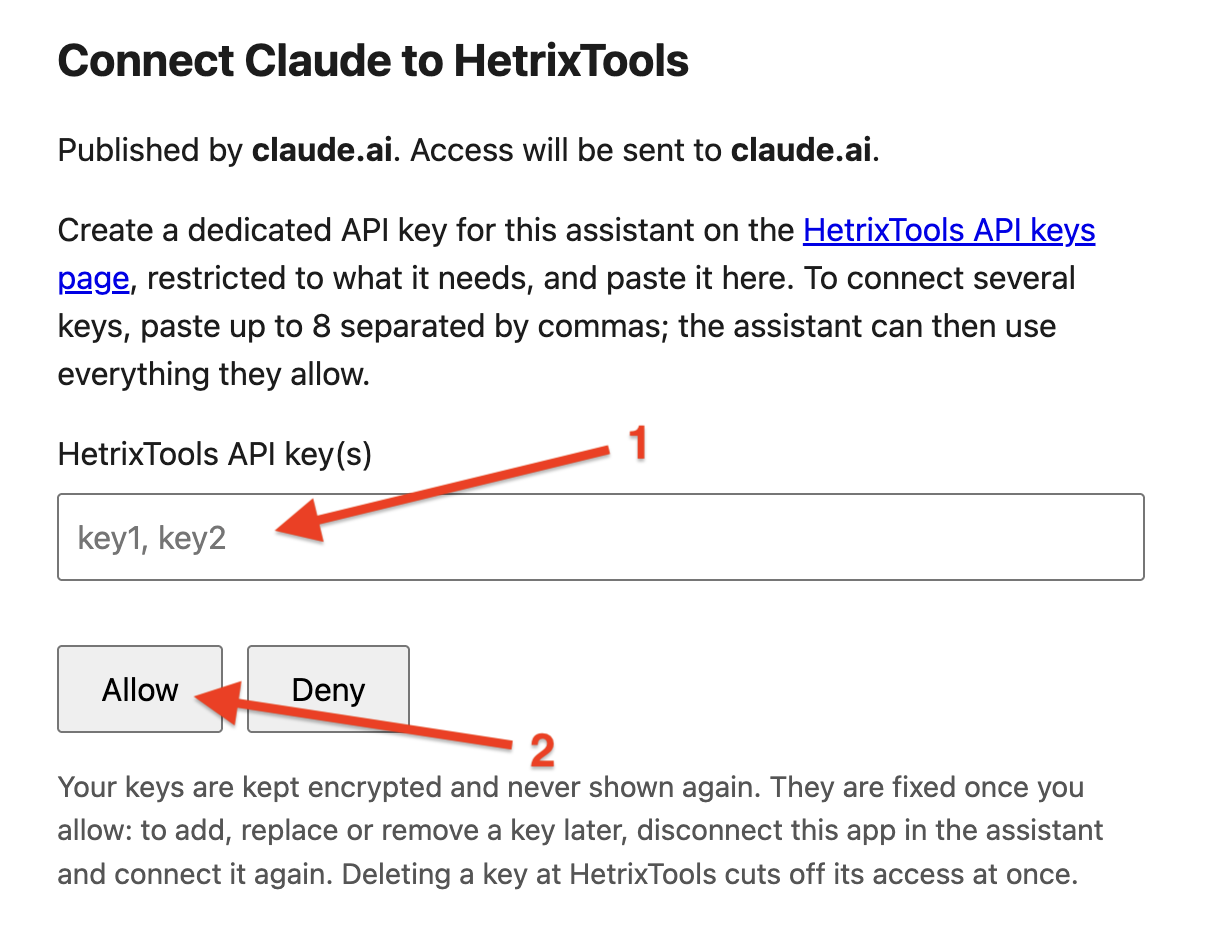
Once the authentication process is confirmed and complete, your Claude will be fully connected to our MCP server.
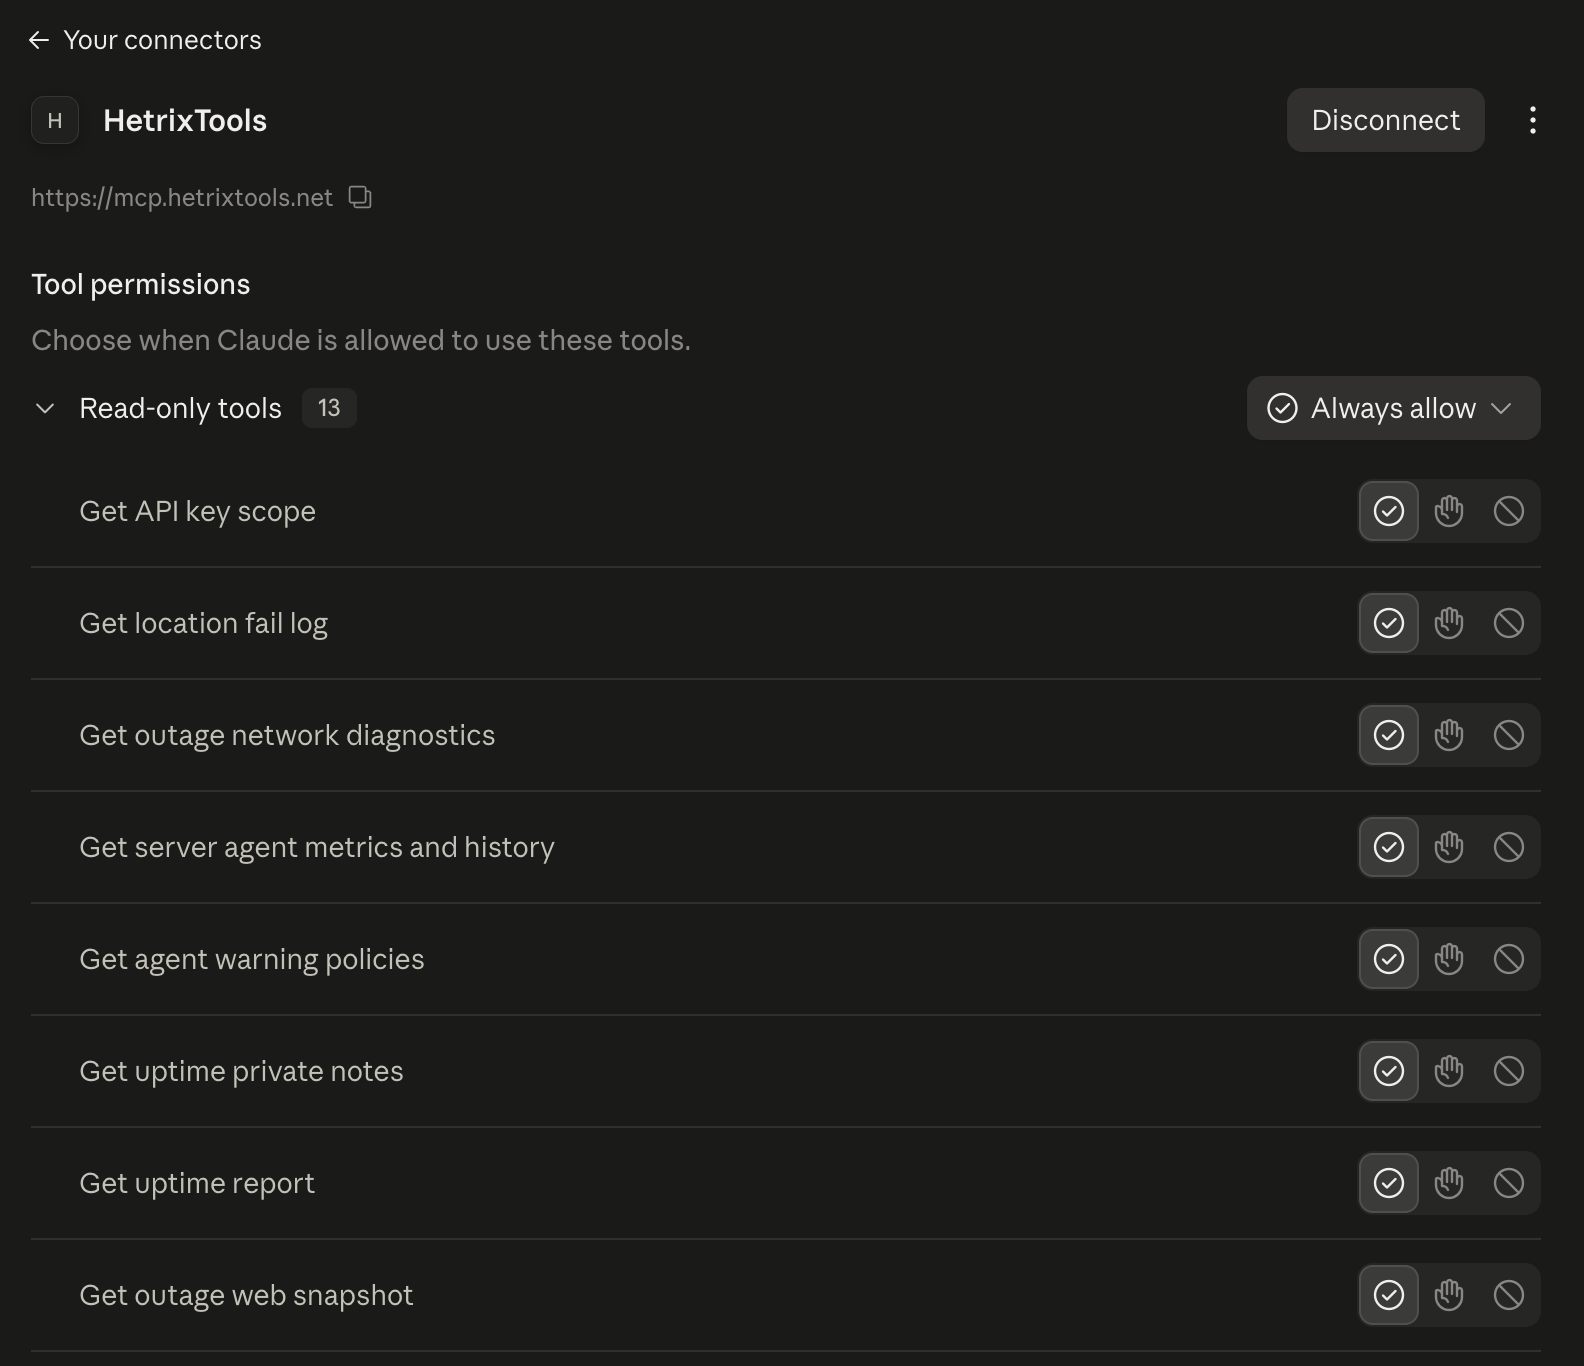
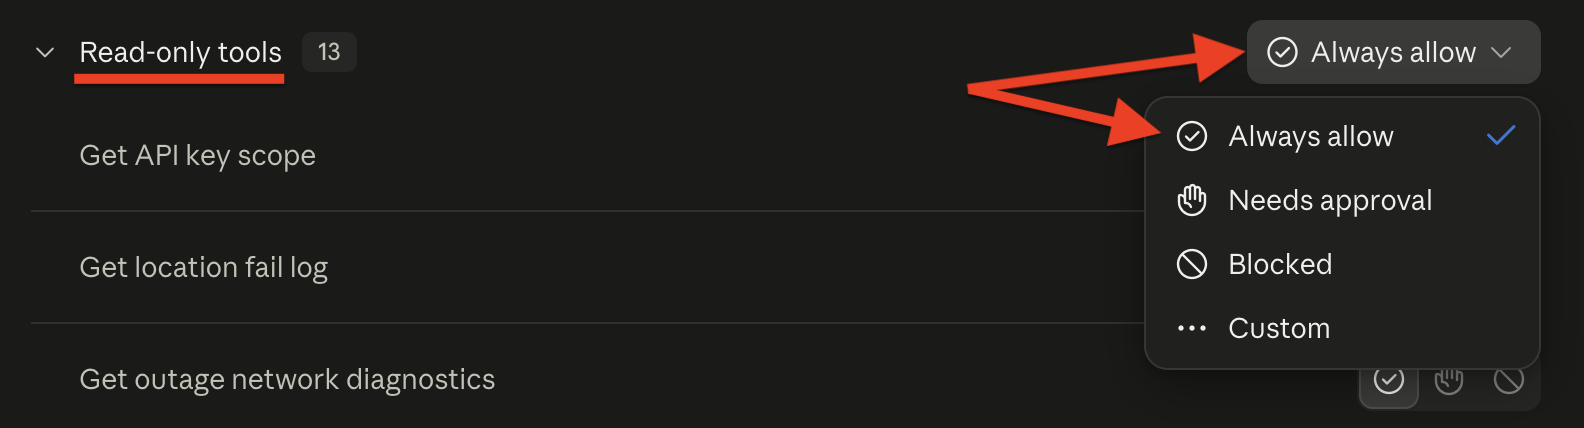
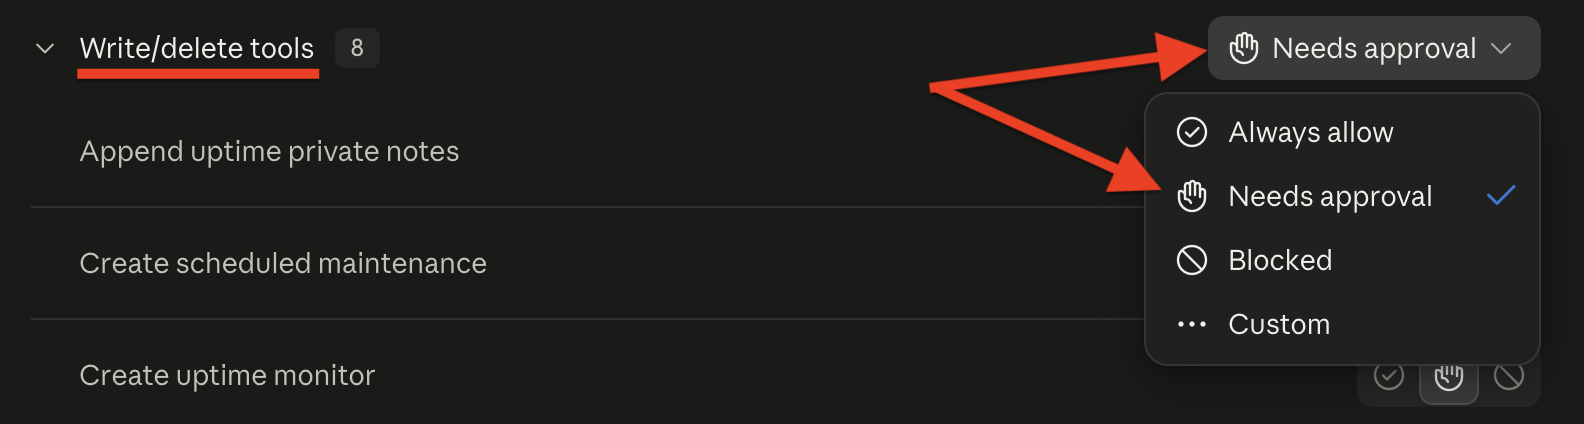
We recommend setting all the “Read-only tools” permissions to “Always allow” and the “Write/delete tools” permissions to “Needs approval”.