If you wish to monitor your server’s resources, but you do not have root access (i.e.: you’re on a shared web hosting plan), you can just use our PHP Server Monitoring Agent.
The installation procedure is a bit more complex than our regular monitoring agent, but this guide will show you exactly what you’ve got to do, step by step.
Step 1: Download the “hetrixtools_agent.php” file from GitHub and save it on your local computer.
-
(a)
Right-click on the link below, then select “Save Link As…”:
https://raw.githubusercontent.com/hetrixtools/agent-php/master/hetrixtools_agent.php
Step 2: Upload the “hetrixtools_agent.php” file to your webhosting cPanel account.
-
(a)
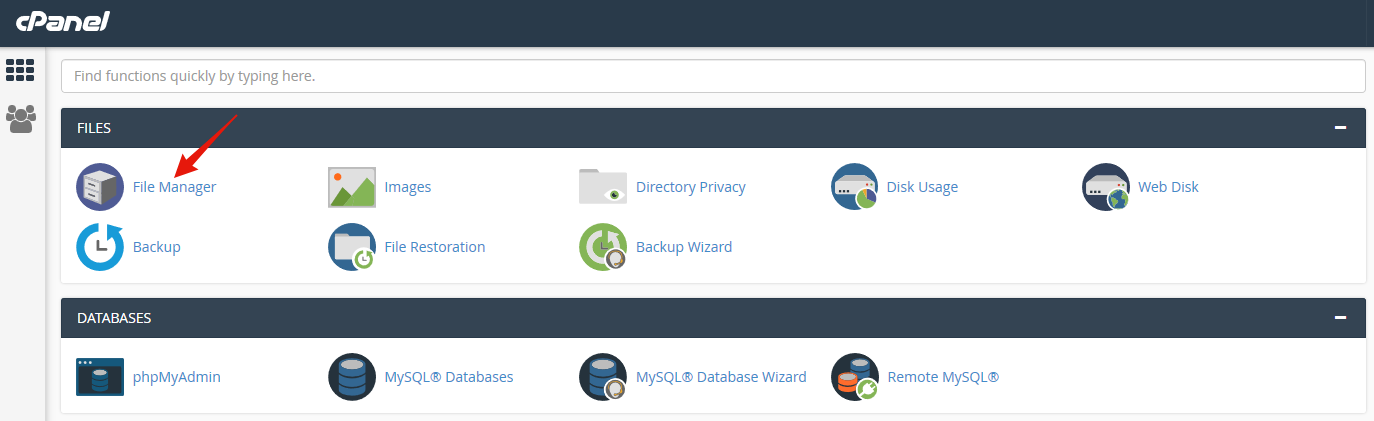
Open your cPanel web interface and click on “File Manager”:
-
(b)
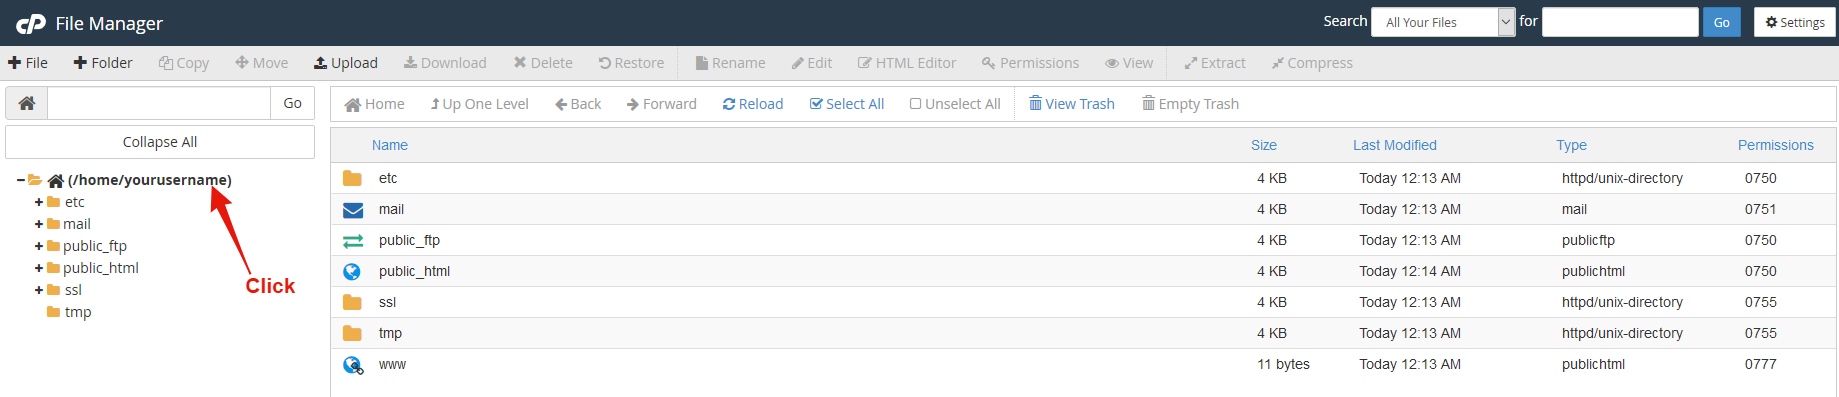
In the “File Manager” make sure you are currently in the home folder of your account, not in the public_html folder:
-
(c)
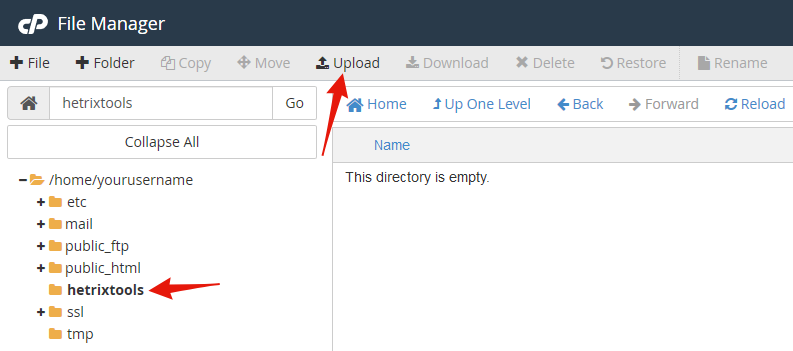
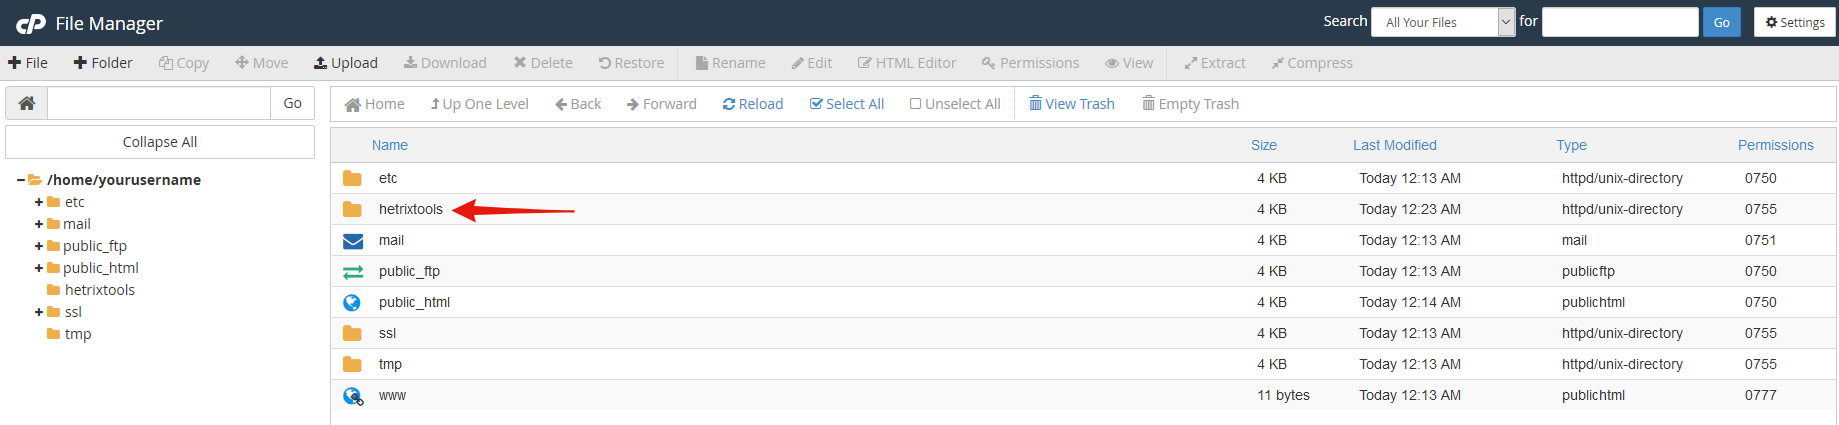
Create a new folder called “hetrixtools” in your home directory:


-
(d)
-
(e)
Upload the “hetrixtools_agent.php” file from your local computer into the “hetrixtools” folder:
-
(f)
Select the “hetrixtools_agent.php” file that you have downloaded at Step 1 Paragraph (a) in this guide.
Step 3: Edit the “hetrixtools_agent.php” file.
-
(a)
-
(b)
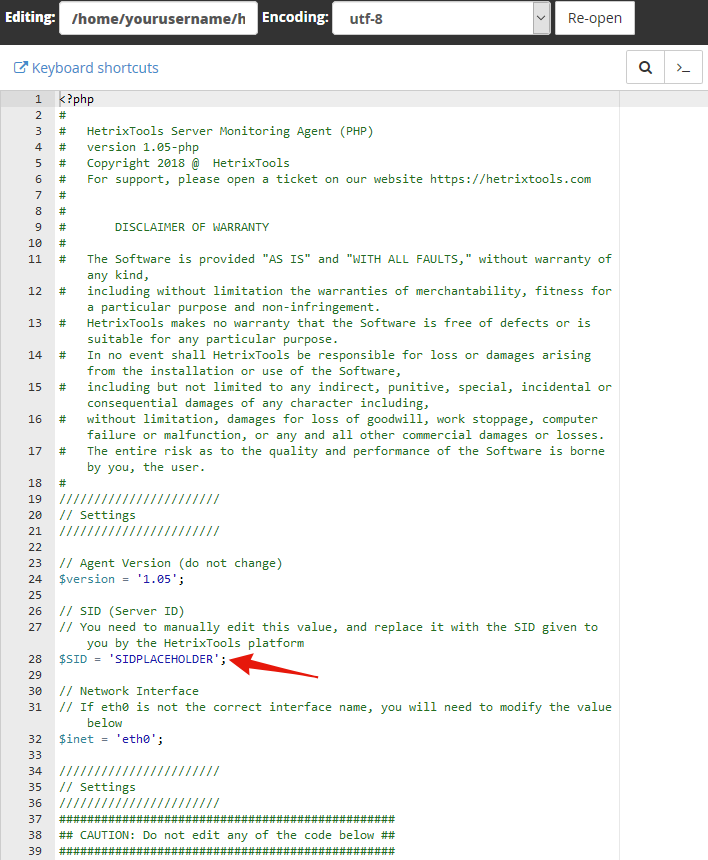
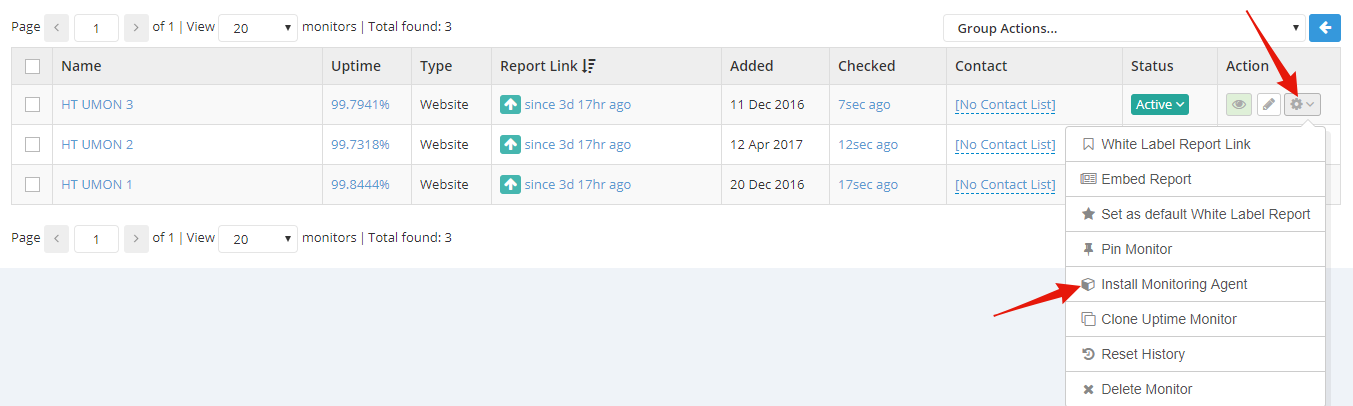
In your cPanel, select the “hetrixtools_agent.php” file and click on “Edit”:

-
(c)
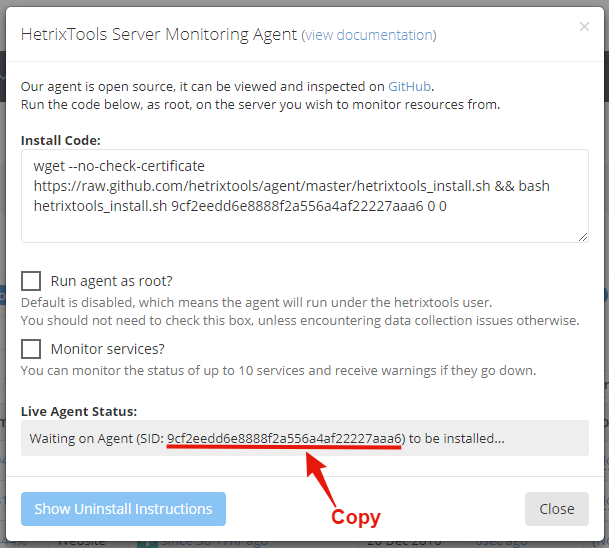
In the Editor window, locate the SIDPLACEHOLDER text:
-
(d)
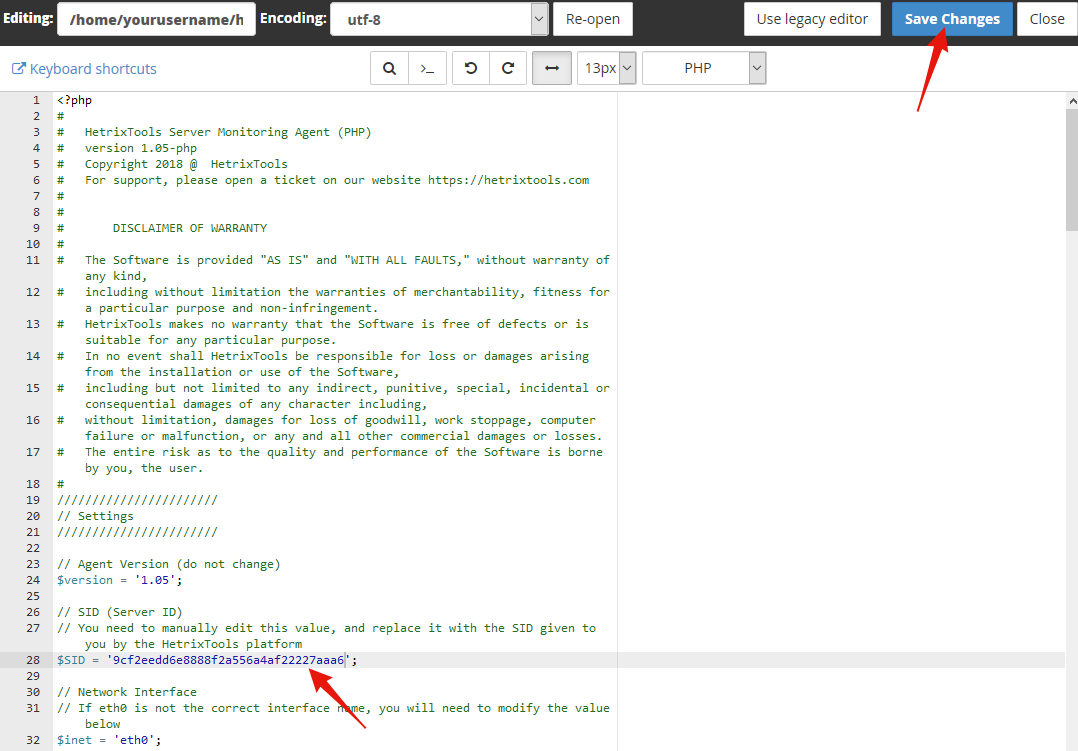
Replace SIDPLACEHOLDER with the Server ID you have gotten at Step 3 Paragraph (a) and then save the changes to the file:
-
(e)
Before closing the Editor window, make sure to copy the path of the “hetrixtools_agent.php” file. You can find this in the top left corner of the Editor window:
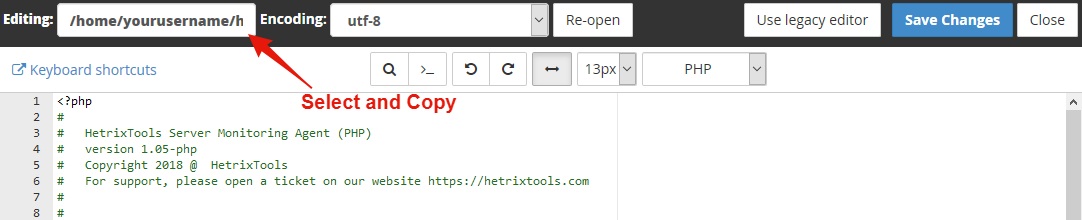
The “hetrixtools_agent.php” file location should look something like this: /home/yourusername/hetrixtools/hetrixtools_agent.php
It differs based on your cPanel username and based on the location of your cPanel account on the actual server, so make sure you get your correct path from the Editor window as explained above.
Step 4: Configuring the cronjob that runs the agent.
-
(a)
From your cPanel web interface go to Cronjobs:

-
(b)
Here you’ll have to create a new cronjob for the agent.
The “Command” field must be: “php – q” (without the quote marks) followed by a space, followed by the script path that you got at Step 3 Paragraph (e).
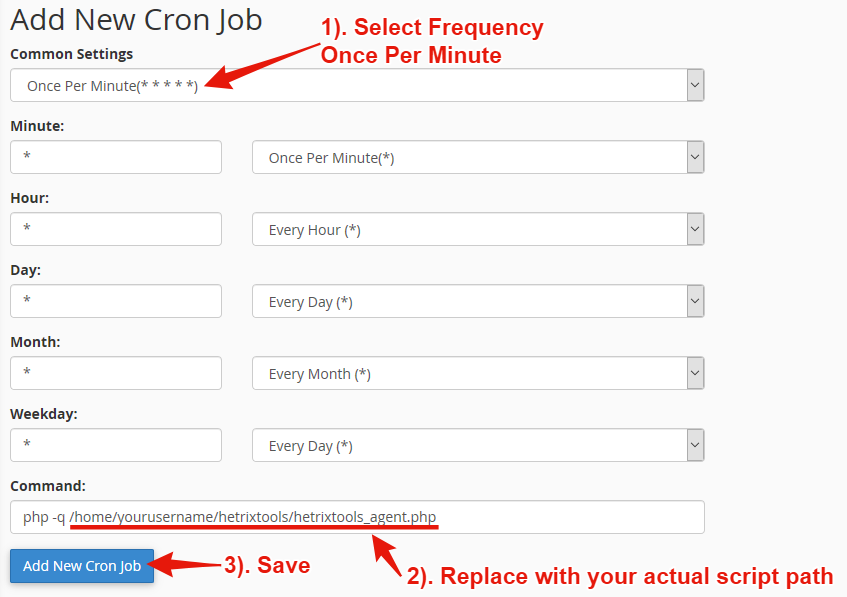
IMPORTANT: some web hosts may not work with the “php -q” command (as shown in the image above), but instead you may have to use the following instead “/usr/local/bin/ea-php72 -q”.
You may replace ’72’ above with any: ’55’, ’56’, ’70’, ’71’, ’73’, etc; based on which PHP versions your hosting provider has installed/available.
And you’re all done. If the steps above have been executed properly, our platform will start receiving data within (2) two minutes from when you’ve added the cronjob.