In this guide we’ll describe how to install our PHP Server Monitoring Agent on your shared hosting environment that’s running on the DirectAdmin control panel.
Step 1: Download the “hetrixtools_agent.php” file from GitHub and save it on your local computer.
(a)
Right-click on the link below, then select “Save Link As…”:
https://raw.githubusercontent.com/hetrixtools/agent-php/master/hetrixtools_agent.php
Step 2: Upload the “hetrixtools_agent.php” file to your webhosting DirectAdmin account.
(a)
Open up your DirectAdmin panel web interface and locate and click on your “File Manager” icon:

(b)
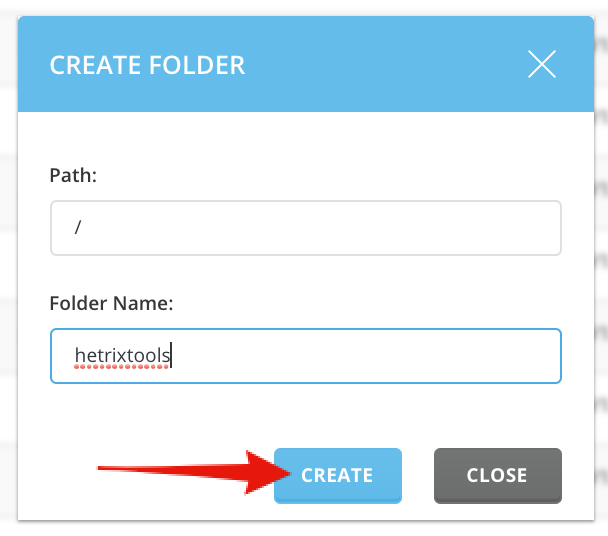
Now that the “File Manager” has been opened, make sure you are in the “Root” folder of your account and click on the “New Folder” button in order to create a new folder here:

(c)
Name this new folder “hetrixtools” and click on the “Create” button:
(d)
Now that the “hetrixtools” folder has been created, access it from your folder tree:

(e)
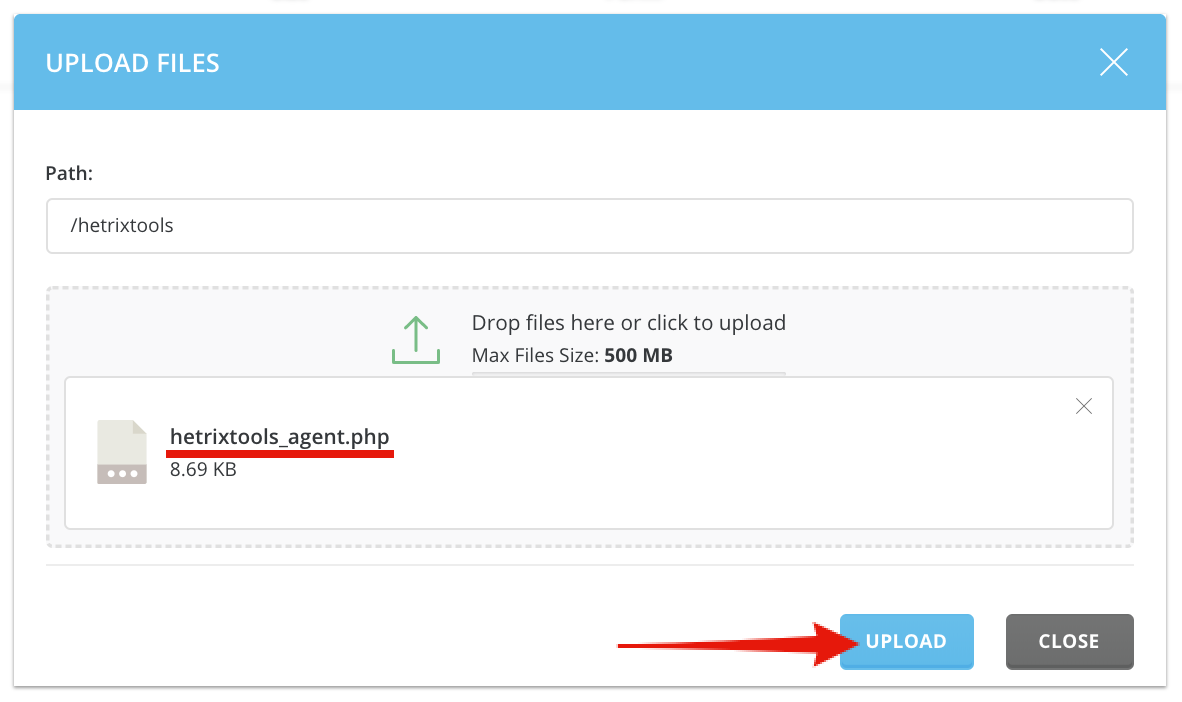
Once in the “hetrixtools” folder (which should be empty at this point), click on the “Upload File” button:

(f)
In the “Upload Files” drag and drop the “hetrixtools_agent.php” file that you have downloaded at Step1 paragraph (a) in this guide, and then click the “Upload” button:
Step 3: Edit the “hetrixtools_agent.php” file.
(a)
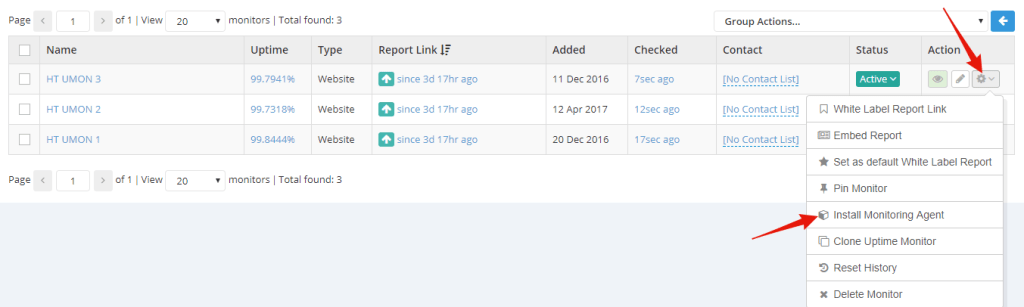
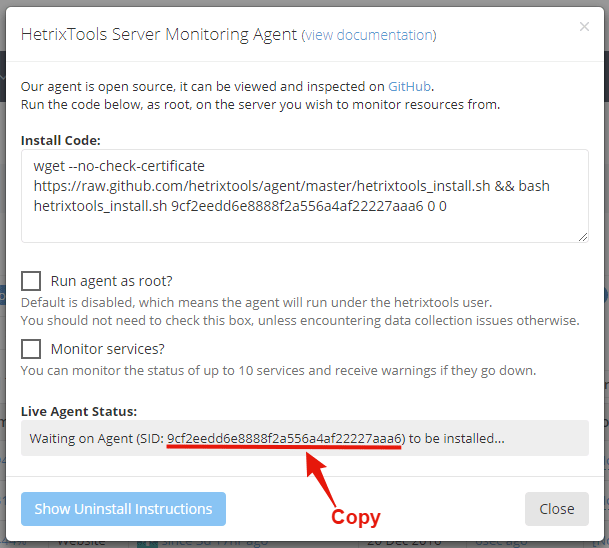
Go to your Uptime Monitors in your HetrixTools dashboard, and get the SID (Server ID) from the Agent Install screen:
(b)
Going back to your DirectAdmin File Manager, click the “hetrixtools_agent.php” file that you’ve uploaded earlier, and select “Edit File”:
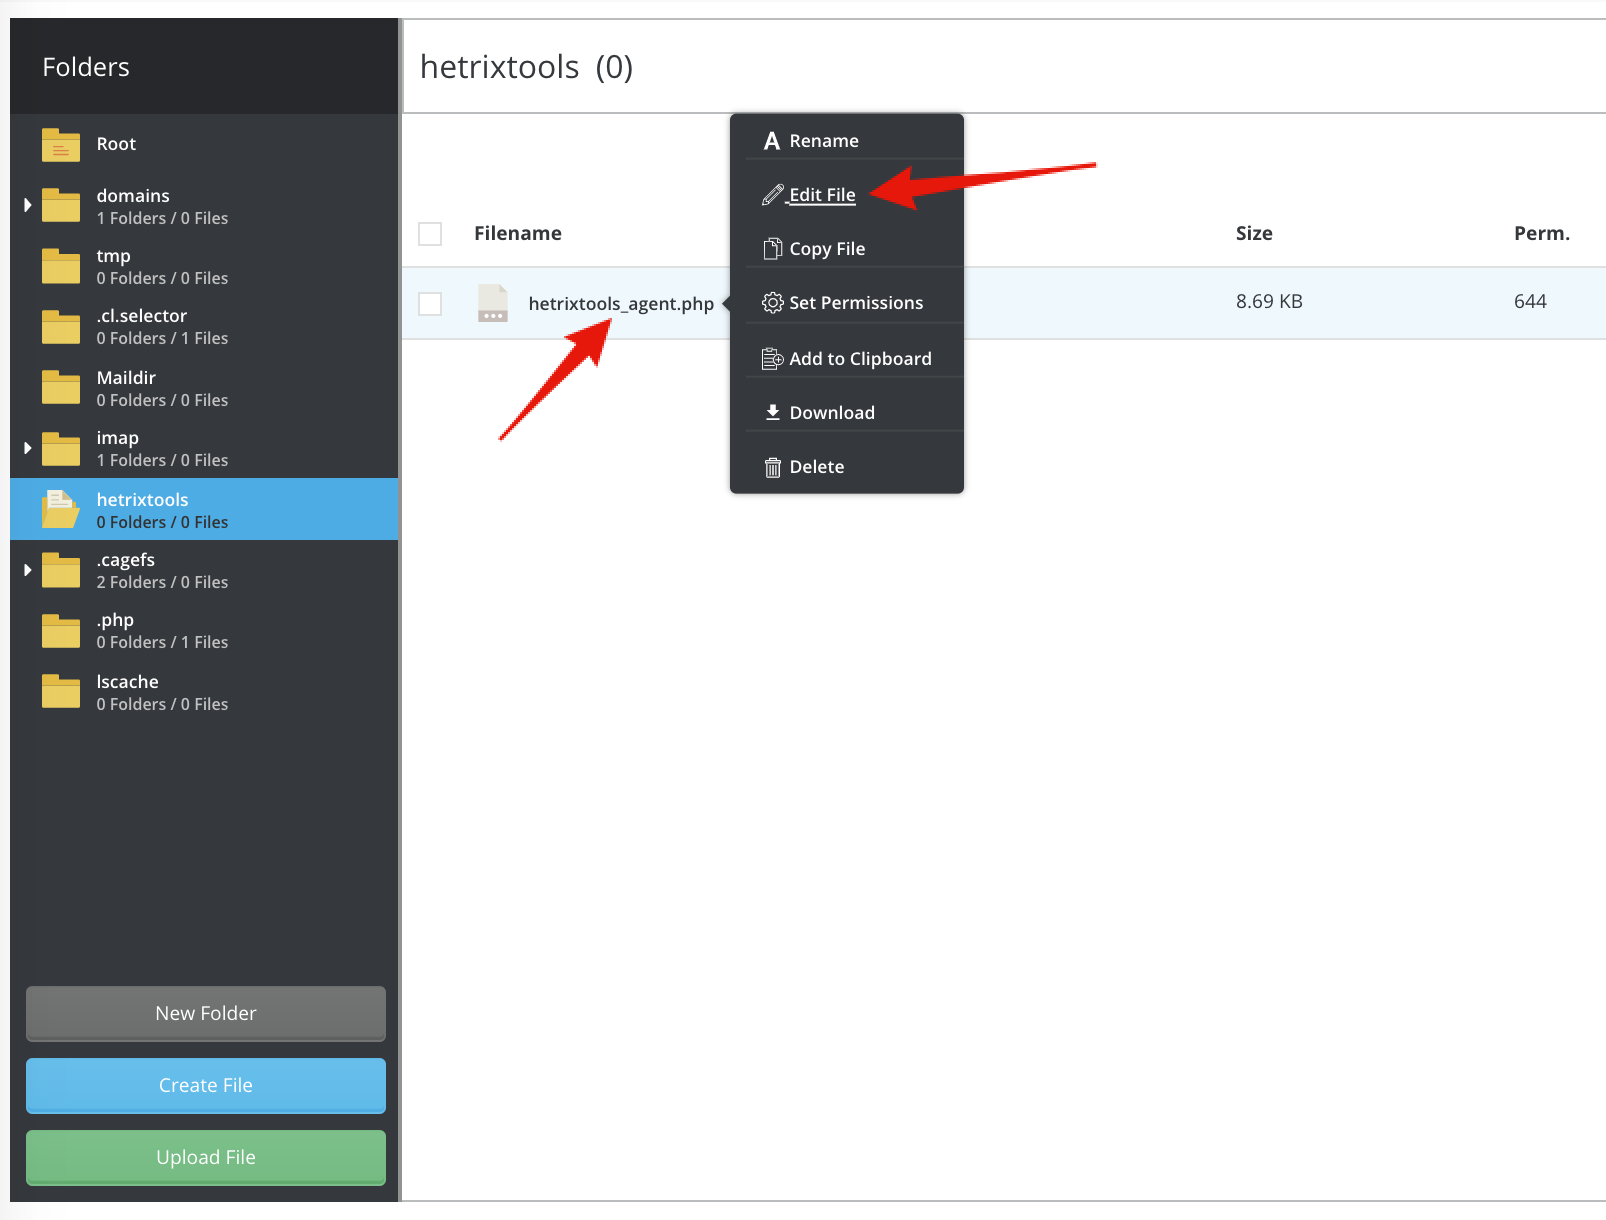
(c)
In the text editor window, locate ” SIDPLACEHOLDER” and replace it with your SID (Server ID) that you’ve got from Step 3 paragraph (a) in this guide, then save your changes:

Step 4: Configuring the cronjob that runs the agent.
(a)
Go back to your DirectAdmin panel, and locate and click on the “Cron Jobs” icon:

(b)
On your “Cron Jobs” page, click on the “Create Cron Job” button, in order to add a new cron job to your account:

(c)
Everything should be pretty much already filled out on the next page.
You will need to fill out the “Command” field with the following line of text:
php -q /home/YOUR_DA_USERNAME/hetrixtools/hetrixtools_agent.php
(replace “YOUR_DA_USERNAME” with your actual DirectAdmin username in the command line).
Then click on the “Create” button:

Make sure not to replace your actual username in the command path, the word “username” above is just an example.
You’re all done. Our PHP Server Monitoring Agent is now installed in your DirectAdmin shared hosting account and will start sending data to our platform within 2 minutes after creating the cron job.